

Appearance
User Guide for Network Payout
Introduction
We have launched the Network International Payment Integration in the Shopify Multivendor Marketplace app. This integration allows the marketplace admin to send seller payouts directly through Network International.
Using this integration, the admin can configure automatic or manual payouts for sellers. Once configured, payouts can be triggered after order delivery or order fulfillment, depending on the admin’s preference.
Sellers only need to provide their Beneficiary ID, after which the admin can process payouts through the Network International payout system.
This guide explains how to configure the Network International payout method in the marketplace and how sellers can receive their payouts.
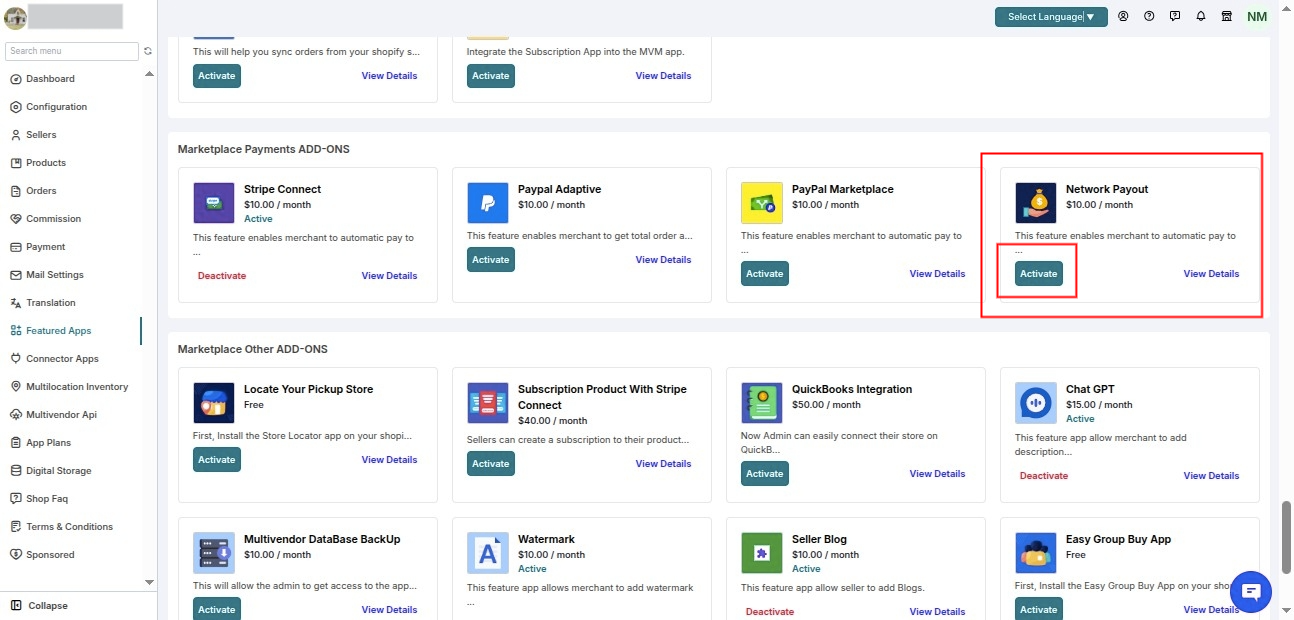
Step 1: Enable the Network Payout Feature App
First, the admin needs to enable the Network Payout feature app from the Feature Apps section.
Note:
The Network Payout feature app costs $10/month, which will be charged in addition to your existing Multivendor Marketplace app plan.
Steps
Go to:
Admin Panel → Feature Apps
Locate the feature app “Network Payout.”
Click Enable to activate the feature.
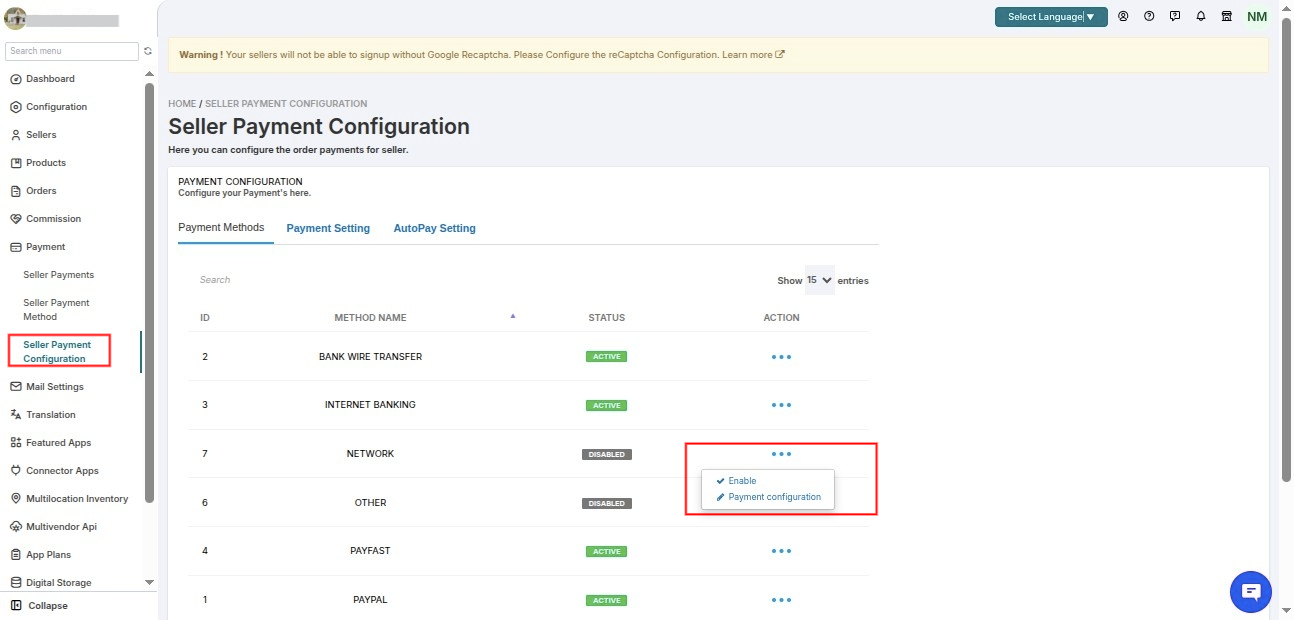
Step 2: Configure Network International Payment
After enabling the feature app, the admin needs to configure the payout settings.
Steps
Navigate to:
Admin Panel → Payments → Seller Payment Configuration
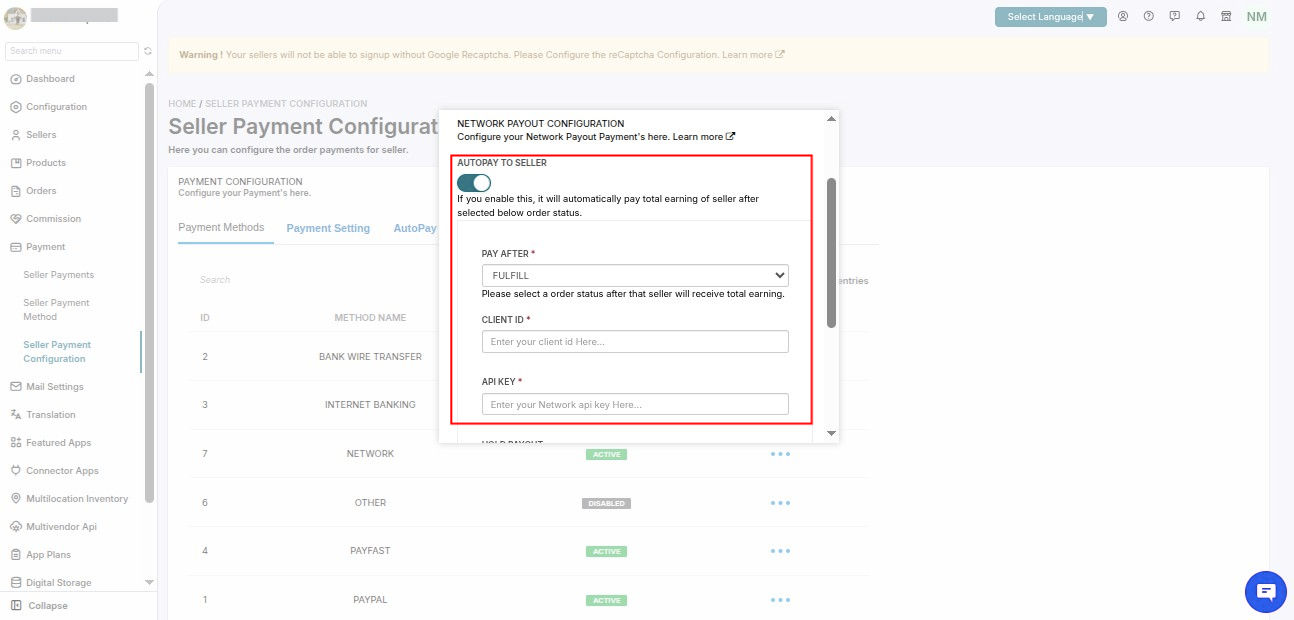
Configure the following options:
Enable Network International Payment Method
- Enable Auto Pay to Seller
- Enter the Client ID
- Enter the API Key
Select the payout trigger condition:
Pay After Delivery
Pay After Fulfillment
Optionally, you can also deduct shipping charges before sending payouts:
Enable Deduct Shipping Charges
- Enter the amount to deduct
Click Save
Step 3: Obtain Client ID (Merchant ID)
The Client ID used in the integration corresponds to the Merchant ID provided by Network International.
Steps to Obtain Merchant ID
Log in to the Network International Merchant Portal (N-Genius Portal).
Navigate to:
Account Settings / Business Information
Locate the Merchant ID / Merchant Reference.
This Merchant ID is used in the payout API endpoint:
text
/payouts/merchants/{merchantId}/payout-ordersThe {merchantId} value is the Client ID that must be entered in the marketplace configuration.
Official Documentation:
https://docs.ngenius-payments.com/
Step 4: Generate API Key
The API Key is required to authenticate payout requests from the marketplace to Network International.
Steps
Log in to the Network International Merchant Portal.
Navigate to:
Developer Settings
Click Generate API Key.
Copy the generated API Key and paste it into the marketplace configuration.
Official Developer Documentation:
https://docs.ngenius-payments.com/docs/authentication
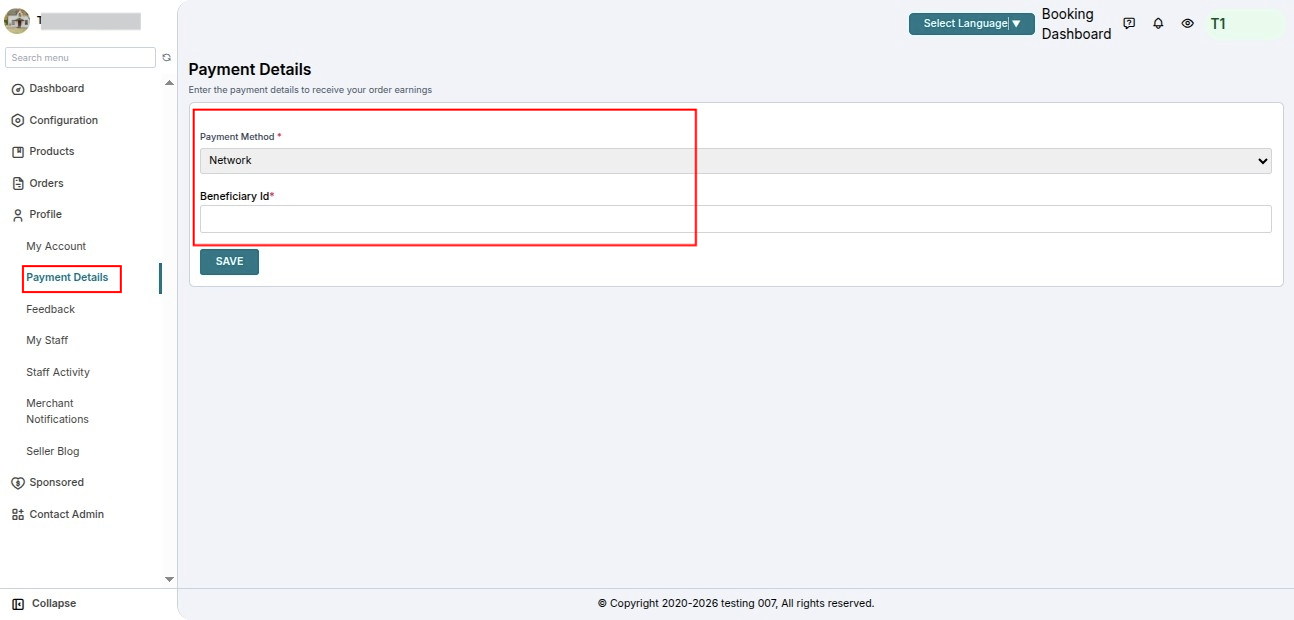
Step 5: Seller Configuration – Adding Beneficiary ID
To receive payouts, each seller must add their Beneficiary ID in their seller panel.
Steps for Sellers
Login to the Seller Panel.
Navigate to:
Seller Panel → Profile → Payment Details
Select Network International as the payment method.
Enter the Beneficiary ID.
Click Save.
Step 6: Create Beneficiary ID (Seller Payout Account)
The Beneficiary ID represents the seller’s payout account in Network International.
Steps
Log in to the Network International Merchant Portal.
Navigate to:
Payouts → Beneficiaries
Click Add Beneficiary.
Enter the seller payout details such as:
Beneficiary Name
Bank Account / IBAN
Country
Currency
Payment Purpose
- After submitting the details, the system generates a Beneficiary ID.
This Beneficiary ID must be shared with the seller so they can add it to their Seller Payment Details.
Official Payout Documentation:
https://docs.ngenius-payments.com/docs/payouts
How the Payout Process Works
Once the setup is complete:
A customer places an order in the marketplace.
Payment is received by the admin.
Based on the configuration:
- Payout is triggered automatically, or
- Admin can send payout manually.
Network International processes the payout.
The seller receives the payment in their registered payout account.
Note:
You can configure payouts to be triggered after order delivery or after order fulfillment, depending on your marketplace payout policy.
Need Support?
Hope you like this blog. To get more interesting blogs, keep in touch with us. If you need any kind of support, simply raise a ticket at https://webkul.uvdesk.com/en/customer/create-ticket/.
You can also contact at support@webkul.com to get proper assistance.
Thank You for reading this Blog!
SCHEDULE DEMO
Click here to Schedule the demo of Multivendor marketplace App for Shopify