

Appearance
User Guide for Influencer Marketplace
Influencer Marketplace: A Powerful Add-on for Multivendor Marketplace
The Influencer Marketplace is an advanced feature app designed to connect sellers with influencers, enabling collaboration to boost product sales through influencer marketing.
This guide covers the complete workflow, including installation, configuration, and usage from Admin, Seller, and Influencer perspectives.
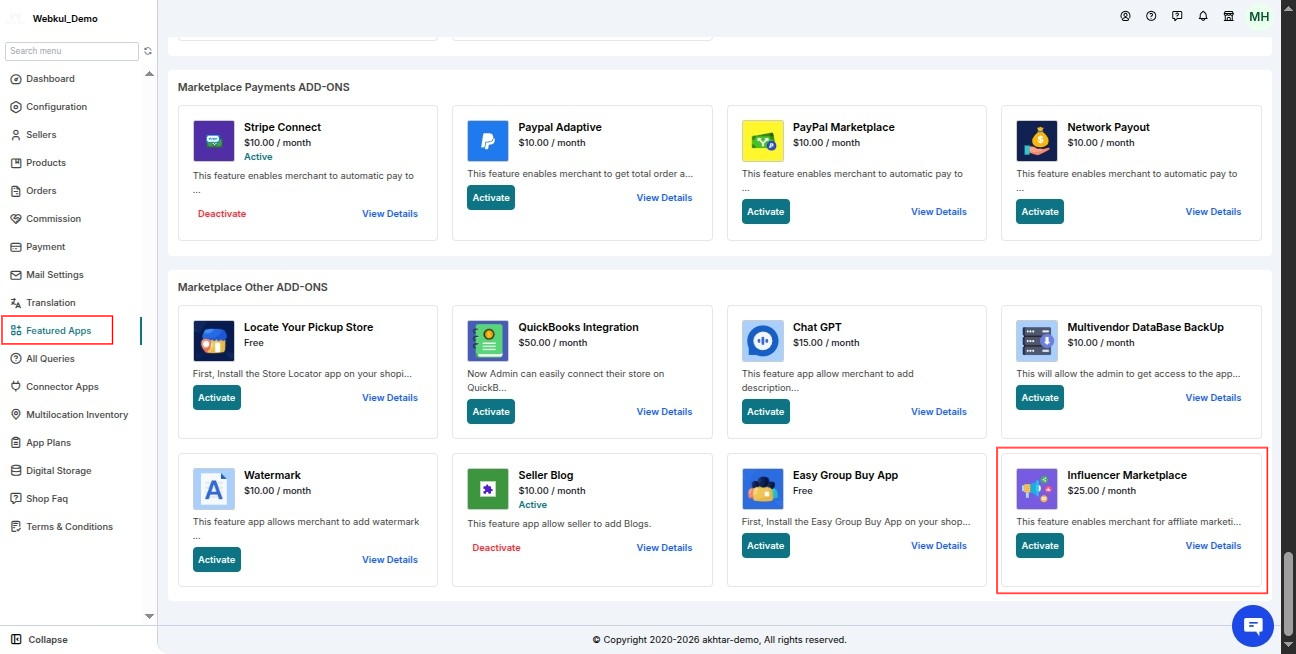
Installation Process & Overview
To begin using the Influencer Marketplace, install the app:
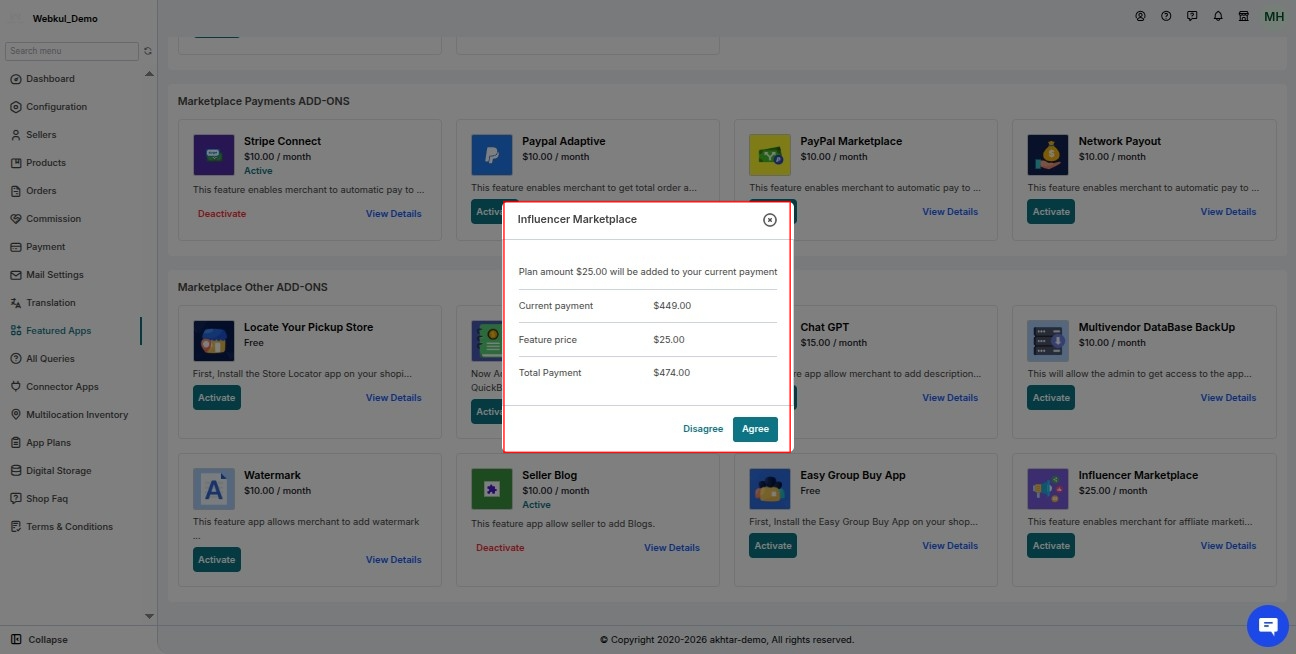
- Navigate to the Multivendor Marketplace App
- Go to the Featured Apps section
- Under Marketplace Other Add-ons, locate Influencer Marketplace
- The app is available at a cost of $10/month
- Click on Install to activate the feature
This app allows sellers to:
- Hire influencers
- Track commissions
- Manage influencer-based promotions
Login Process
There is no separate login required for influencers or sellers.
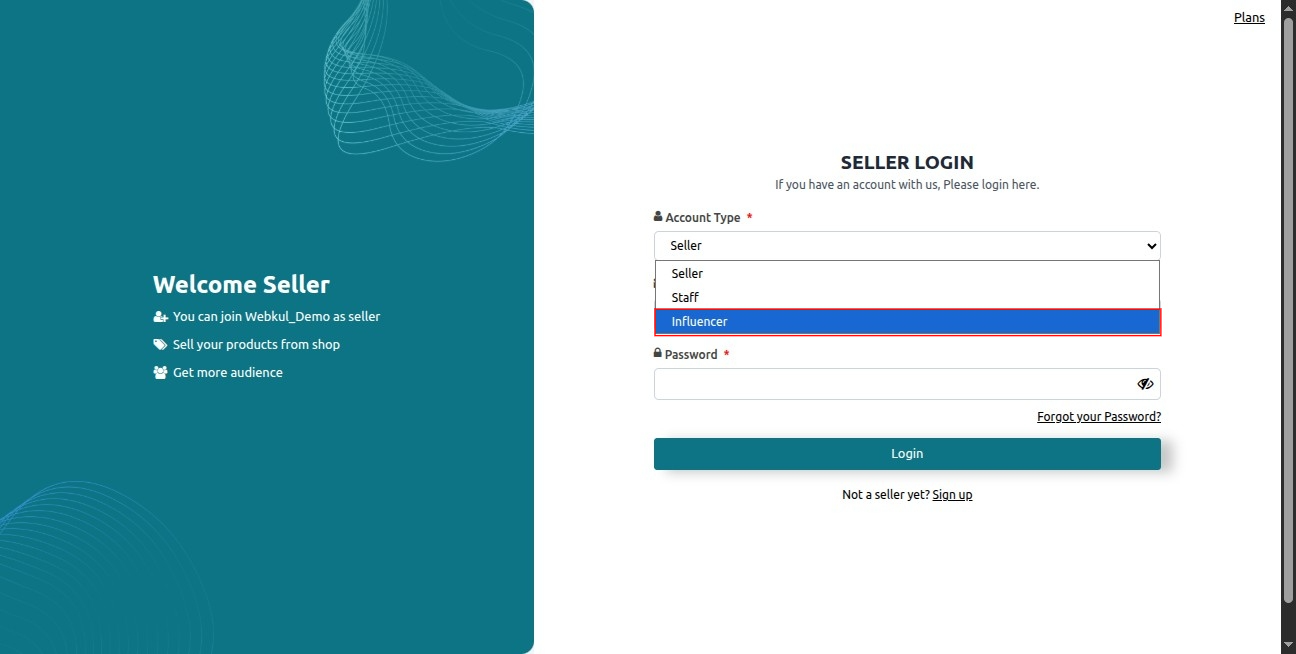
- Users can log in through the same panel used by sellers
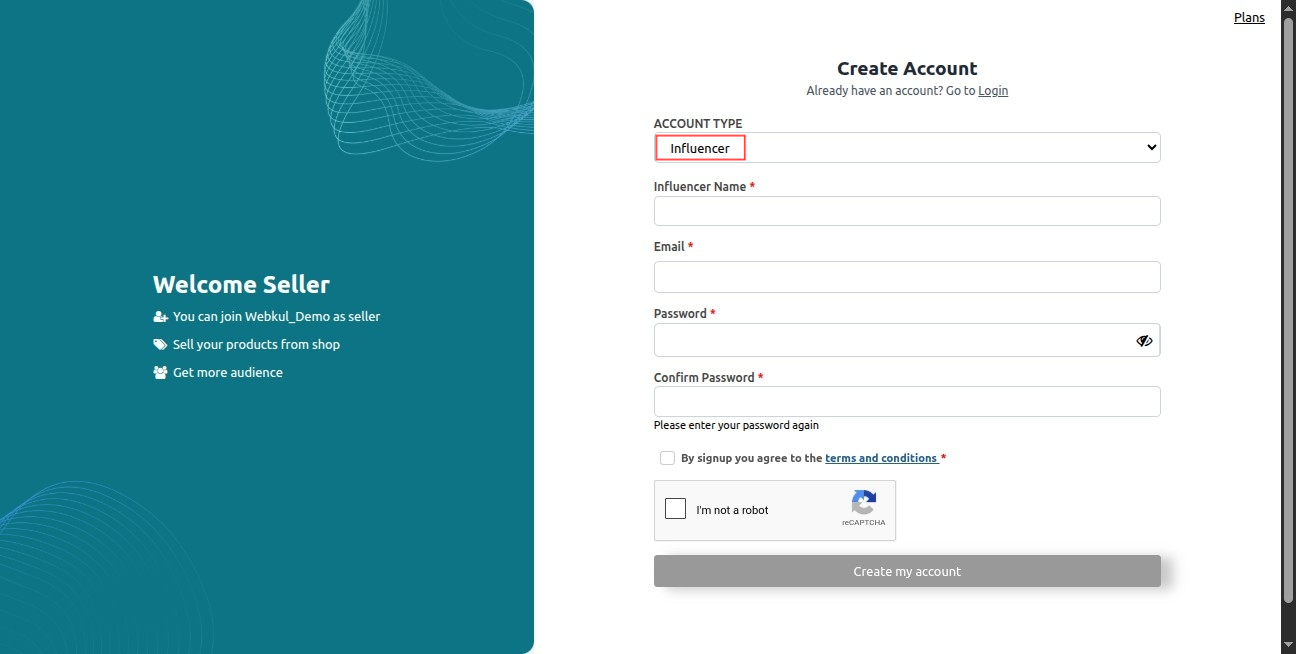
- After installation, a new option called “Influencer” appears in the dropdown menu
- This option is visible only after installation
Admin Panel Configuration
The admin manages and controls the influencer marketplace setup.
Influencer Marketplace Configuration
a. Allow Influencers to Self-Register
- Enable this option to allow users to sign up as influencers
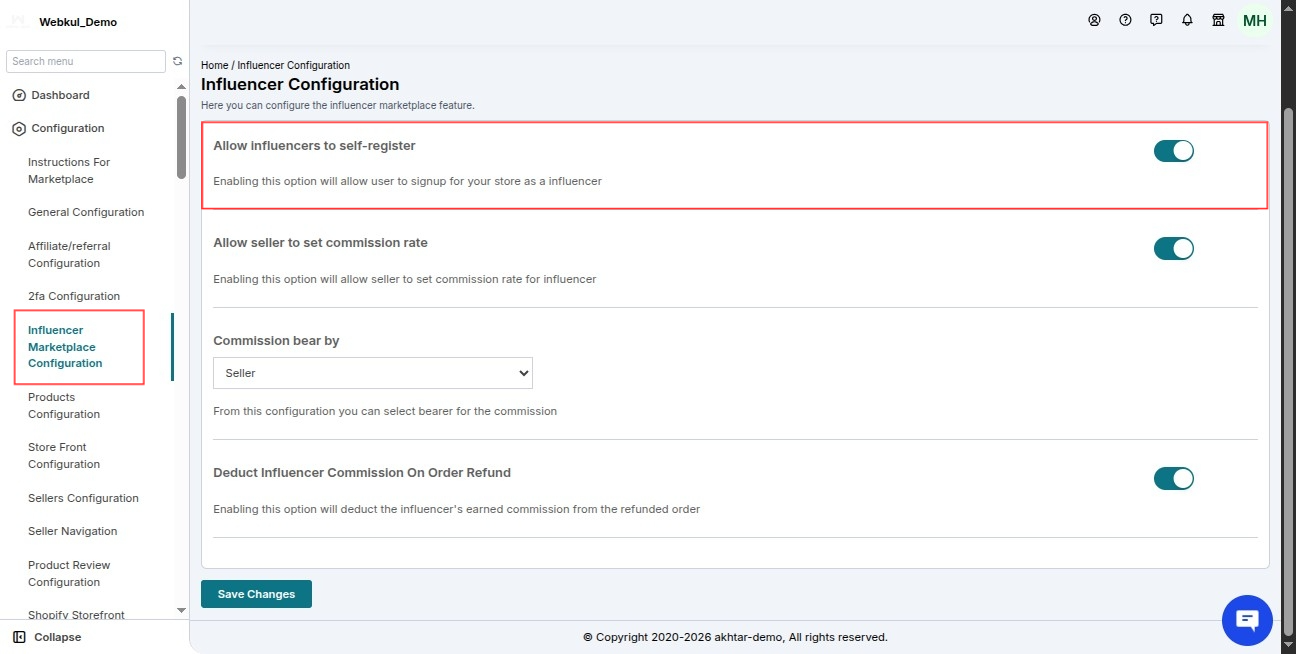
b. Allow Seller to Set Commission Rate
- Sellers can define custom commission rates for each influencer
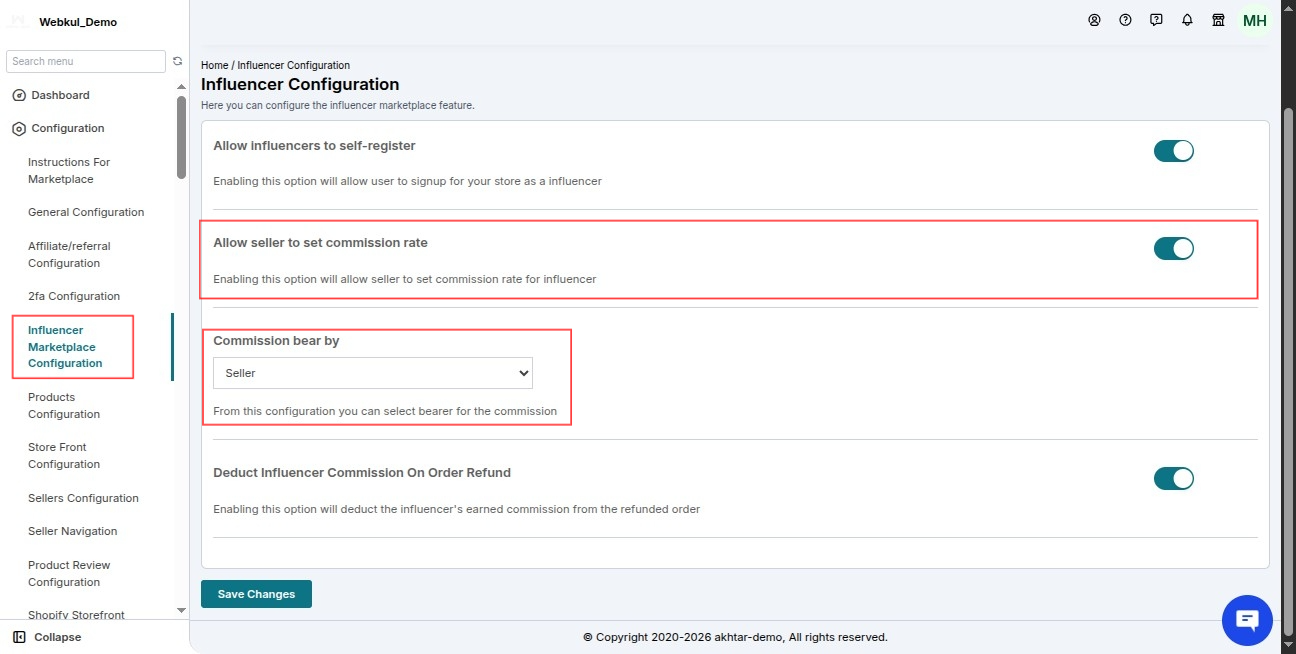
c. Commission Bear By
- Currently, only the Seller option is available
- The seller bears the influencer commission cost
d. Deduct Influencer Commission On Order Refund
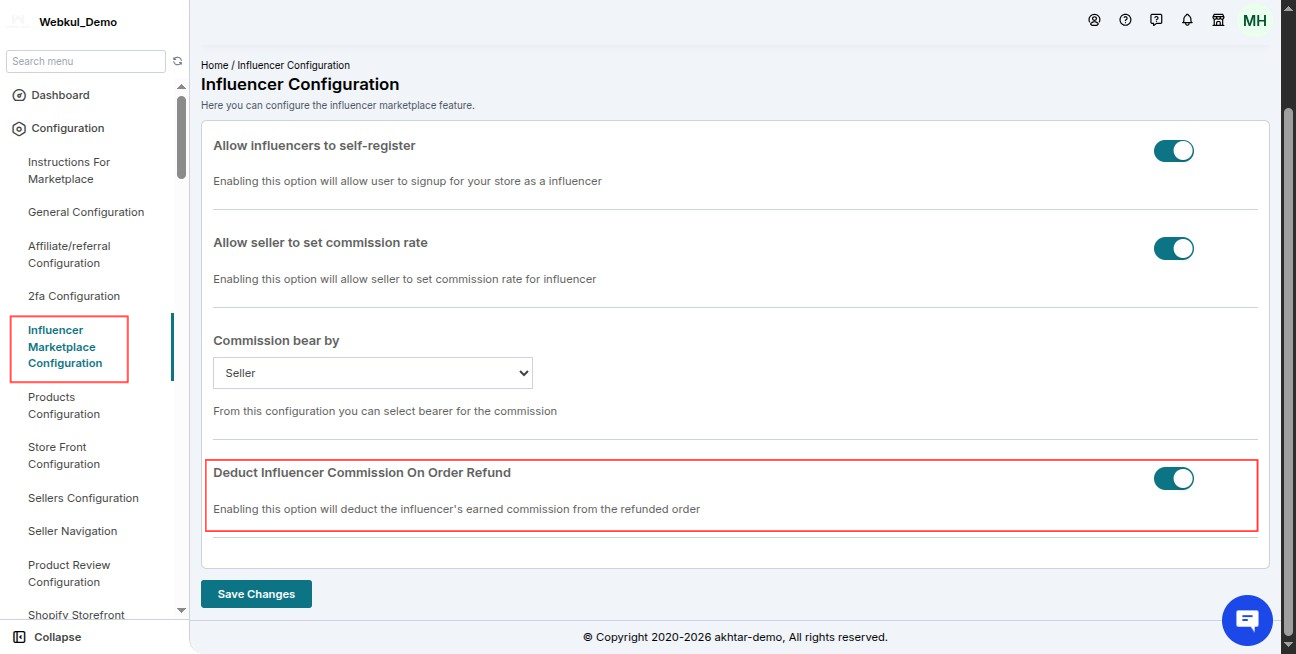
- If enabled, influencer commission is deducted when an order is refunded
Influencer Marketplace Section
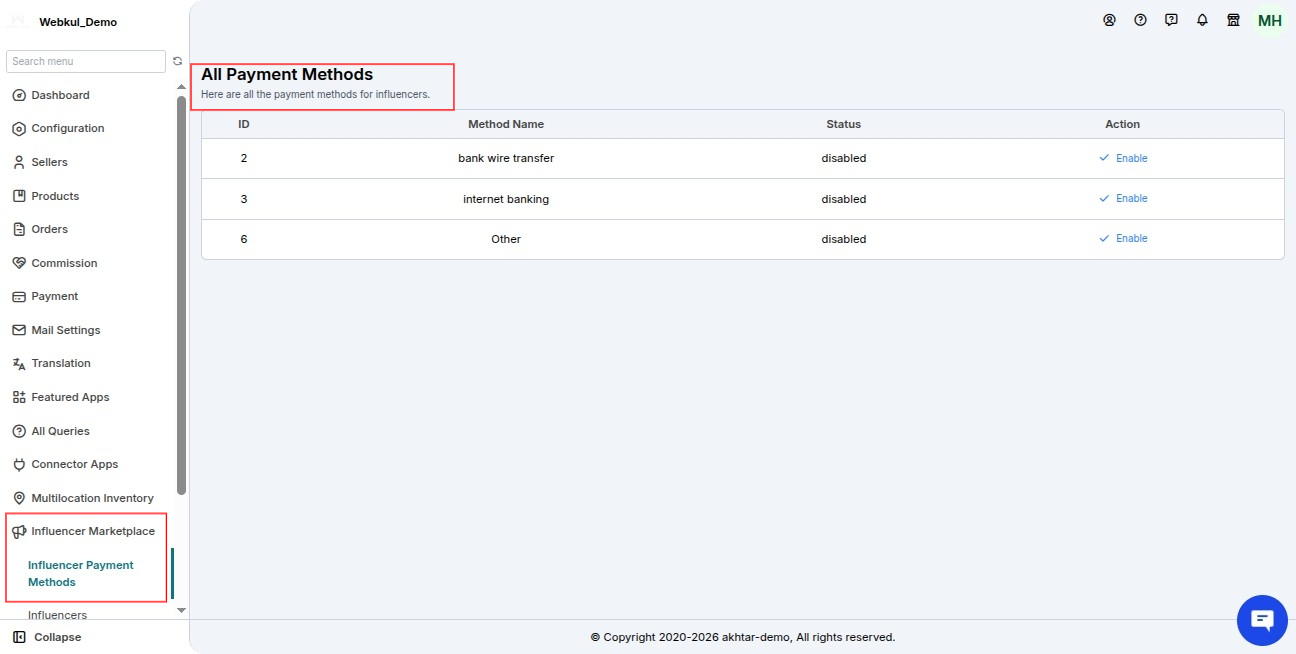
a. Influencer Payment Methods
- Admin can enable payment methods for influencers
b. Manage Influencers
- Add new influencers
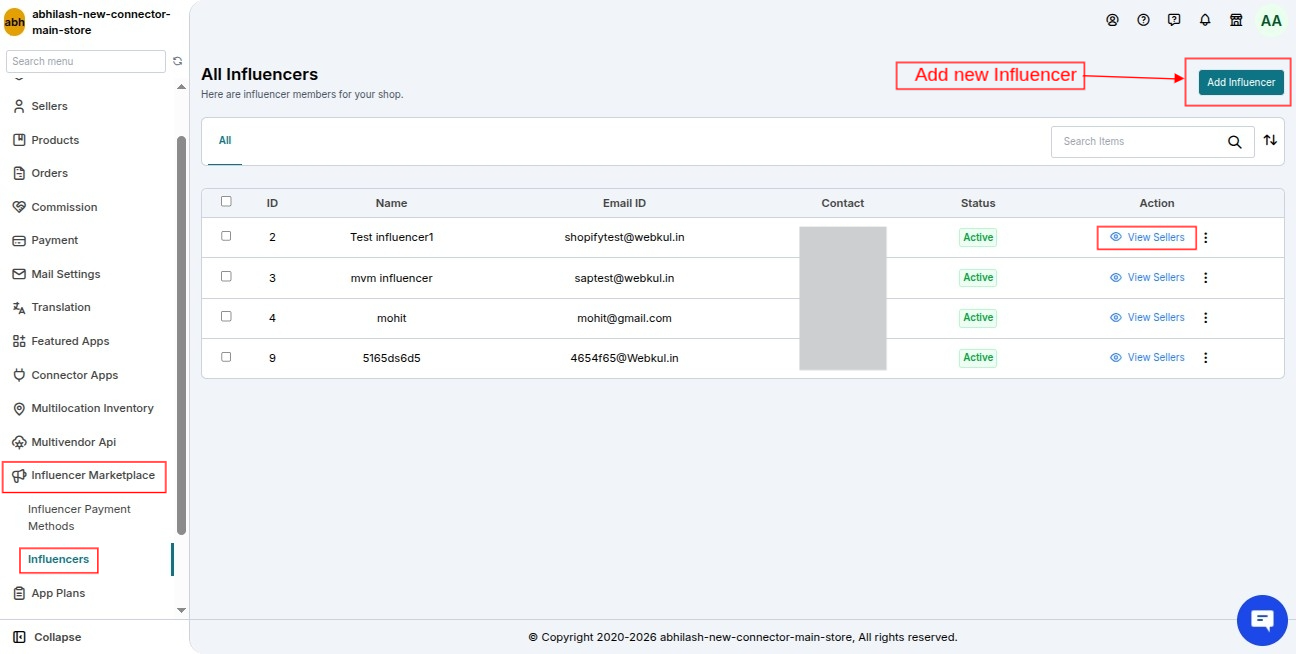
- View associated sellers
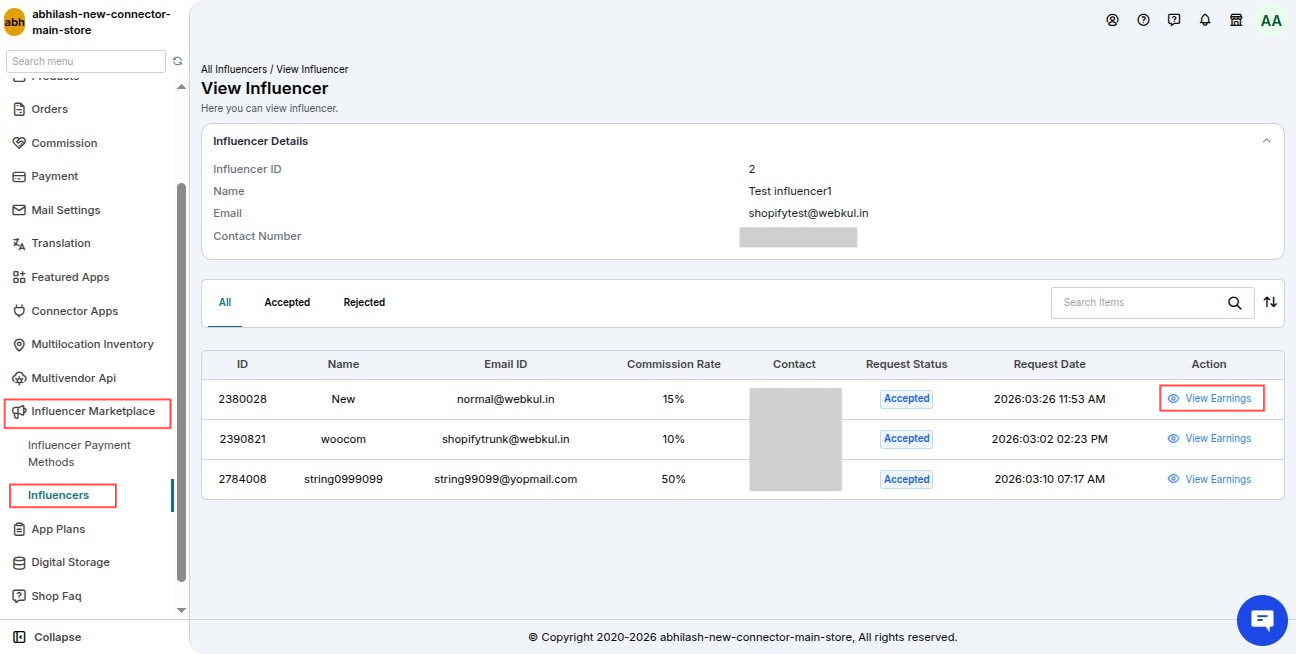
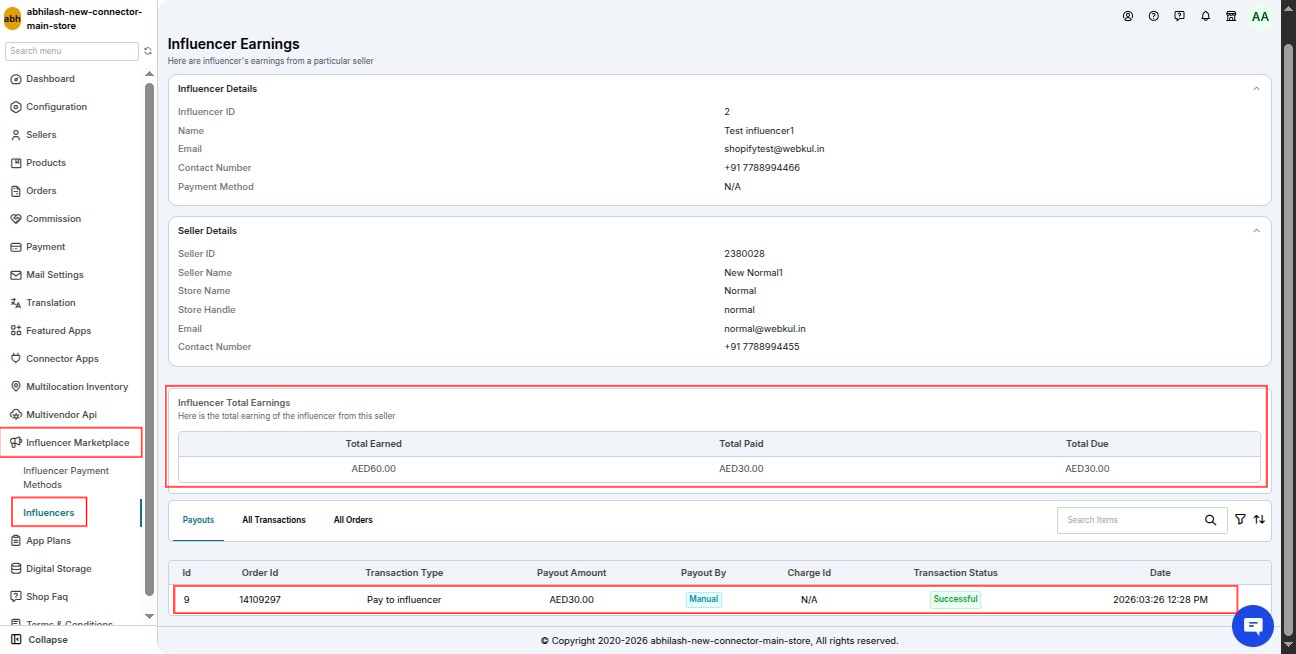
- Check earnings per seller
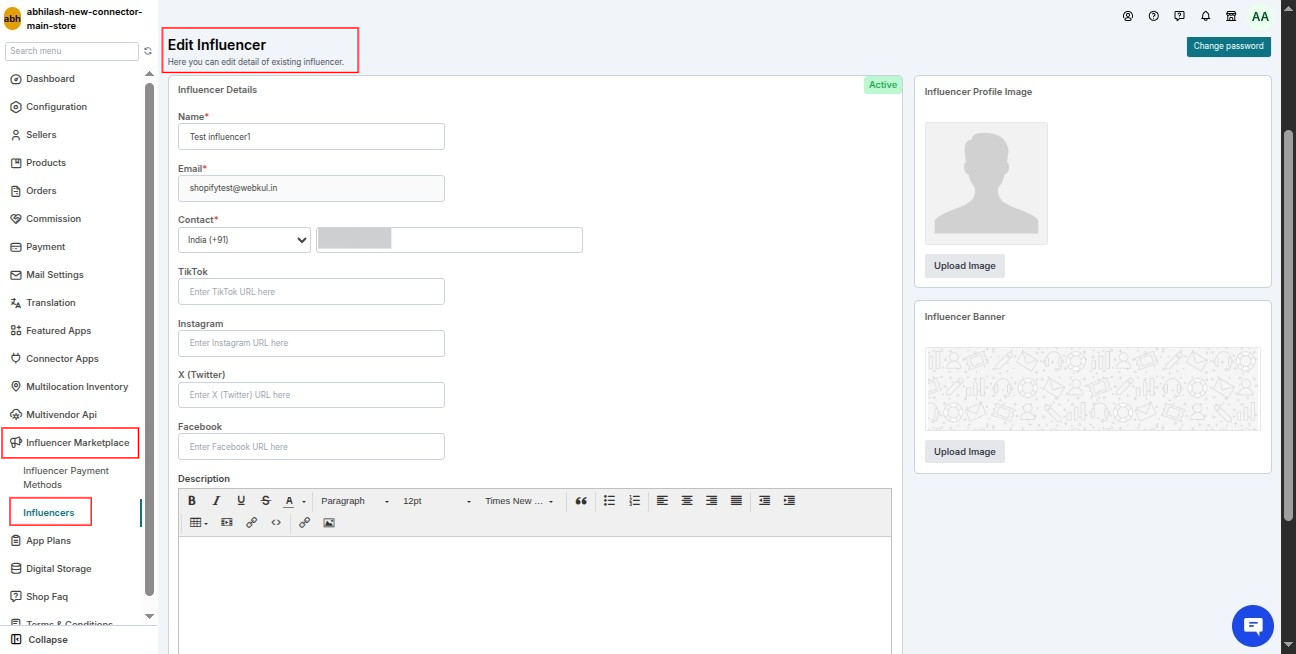
- Edit influencer details
Seller Panel Workflow
Hiring an Influencer
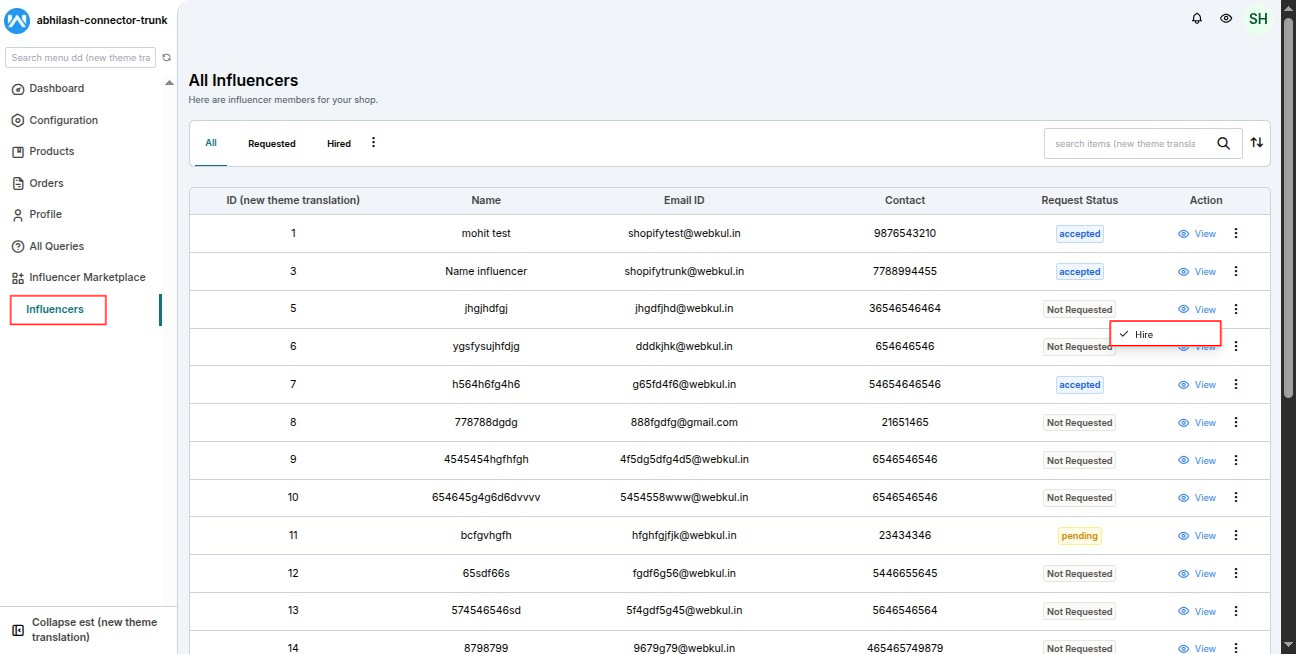
- Navigate to Influencer Marketplace → Influencers
- View the list of available influencers
- Click on three dots (⋮) → Select Hire
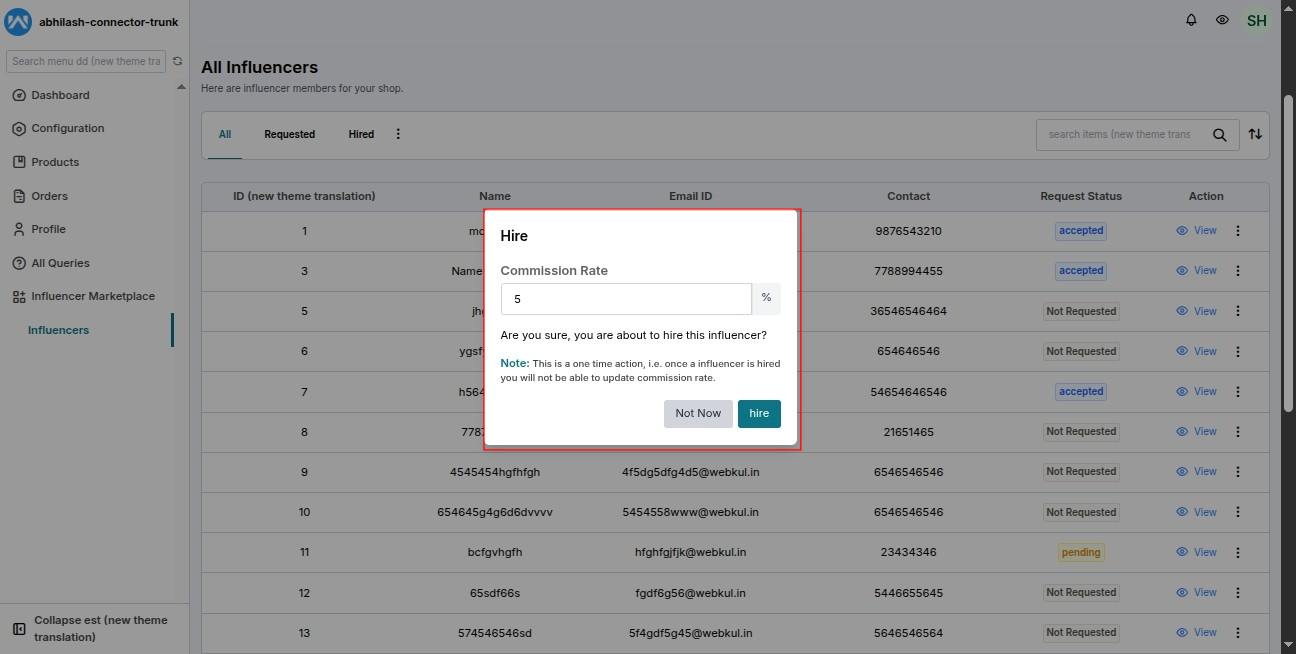
- Set the commission rate while sending the request
Managing Influencers
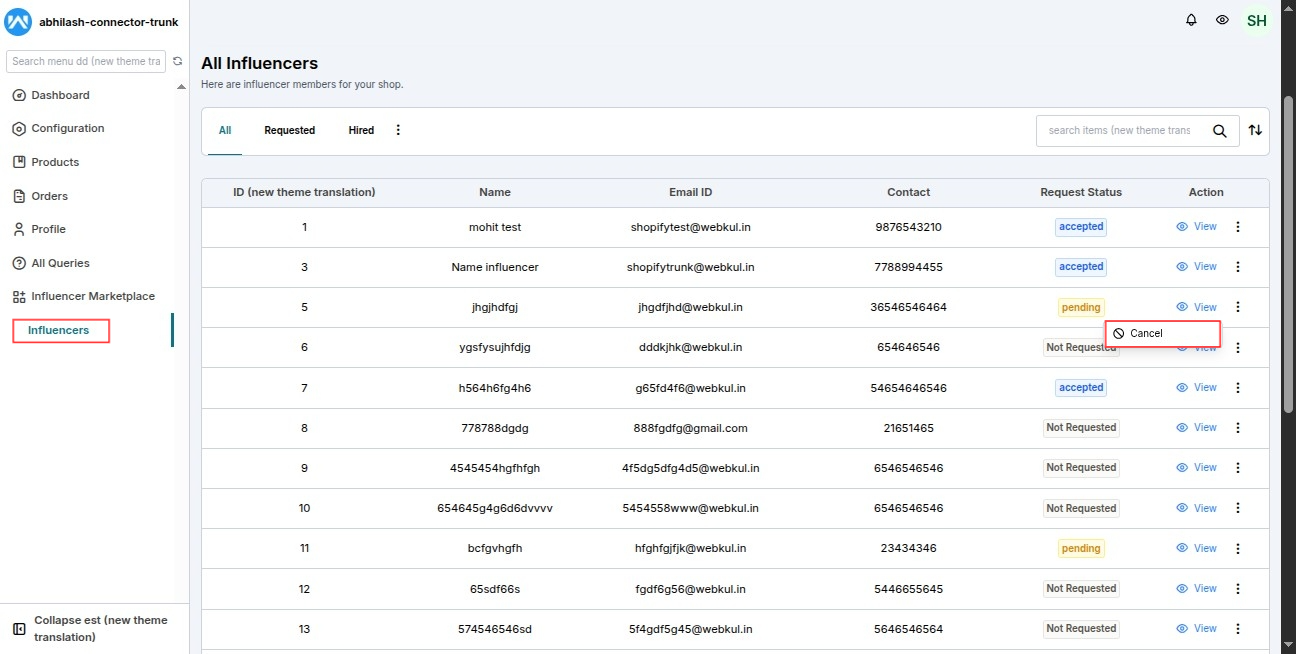
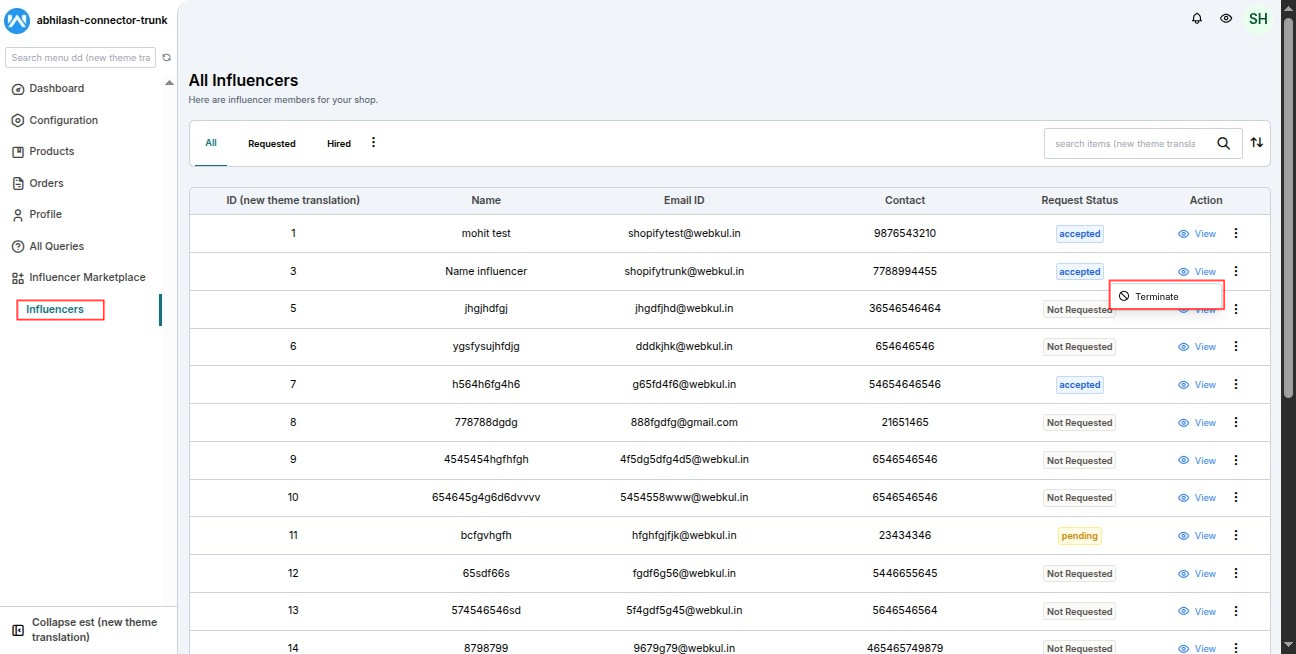
Sellers can:
- Cancel hiring requests
- Terminate hired influencers
Viewing Influencer Details
Sellers can view:
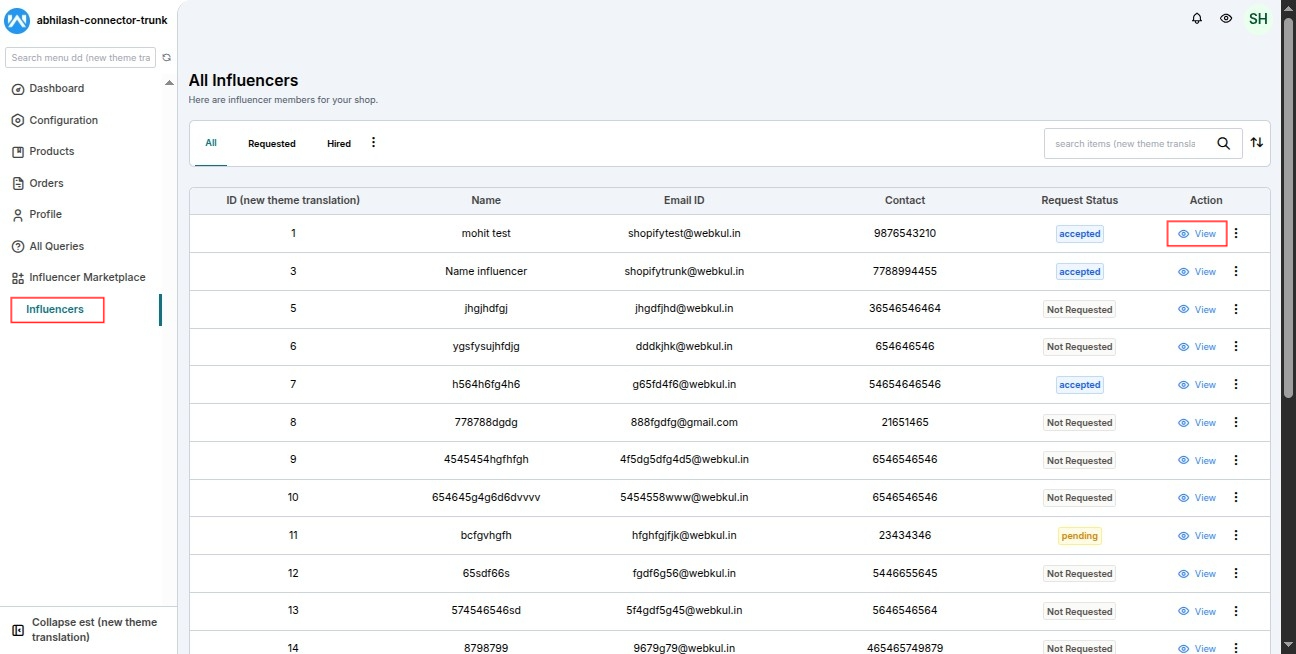
- Total earnings
- Due payments
- Payment history
Payments to Influencers
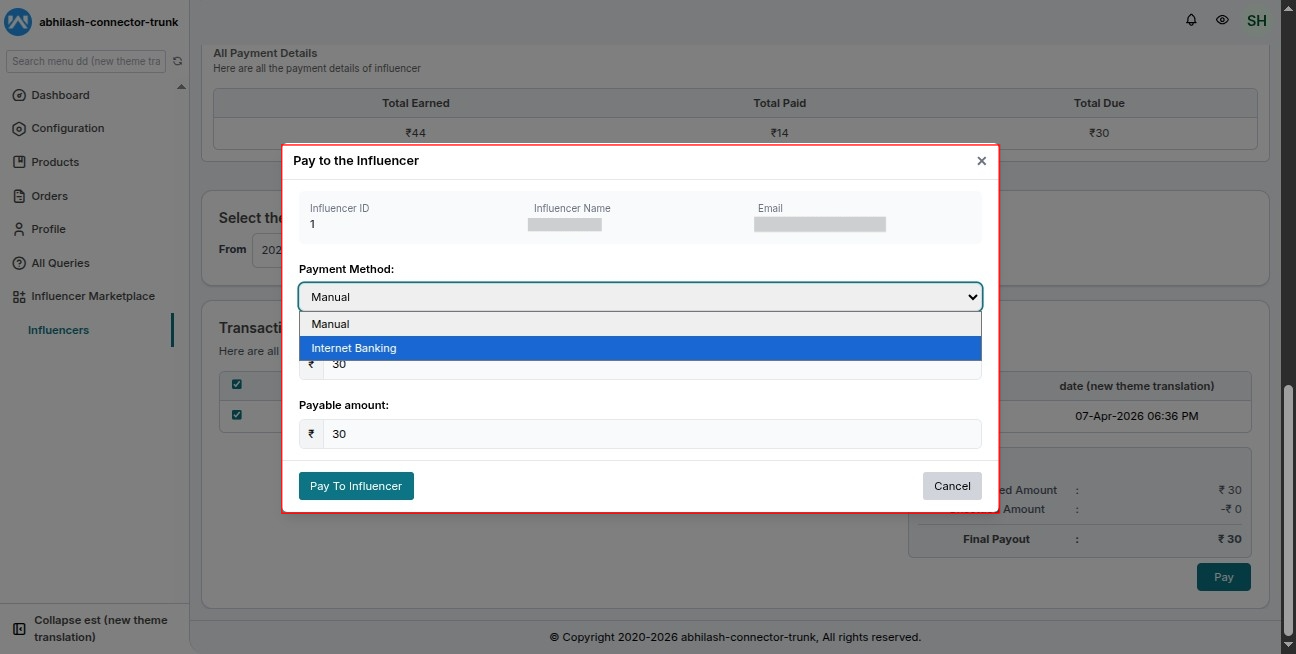
- Use configured payment methods (if available)
- Or:
- Make manual payments
- Record transactions within the app
Order-Based Commission Management
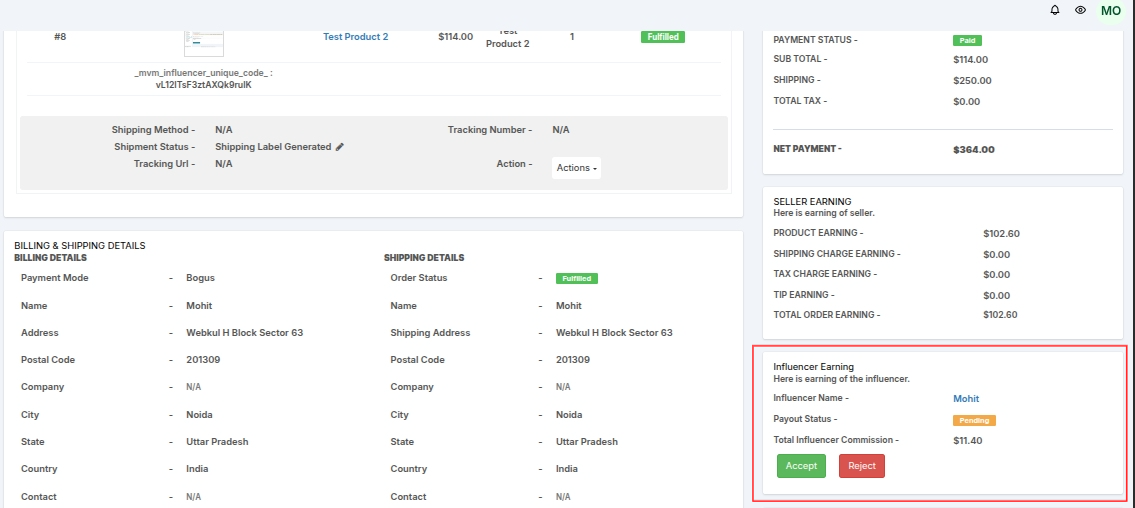
- Go to Order Listing
- View Influencer Earnings
- Accept or reject commission per order
Note: This option is available only after the order is fulfilled.
Influencer Panel / Dashboard
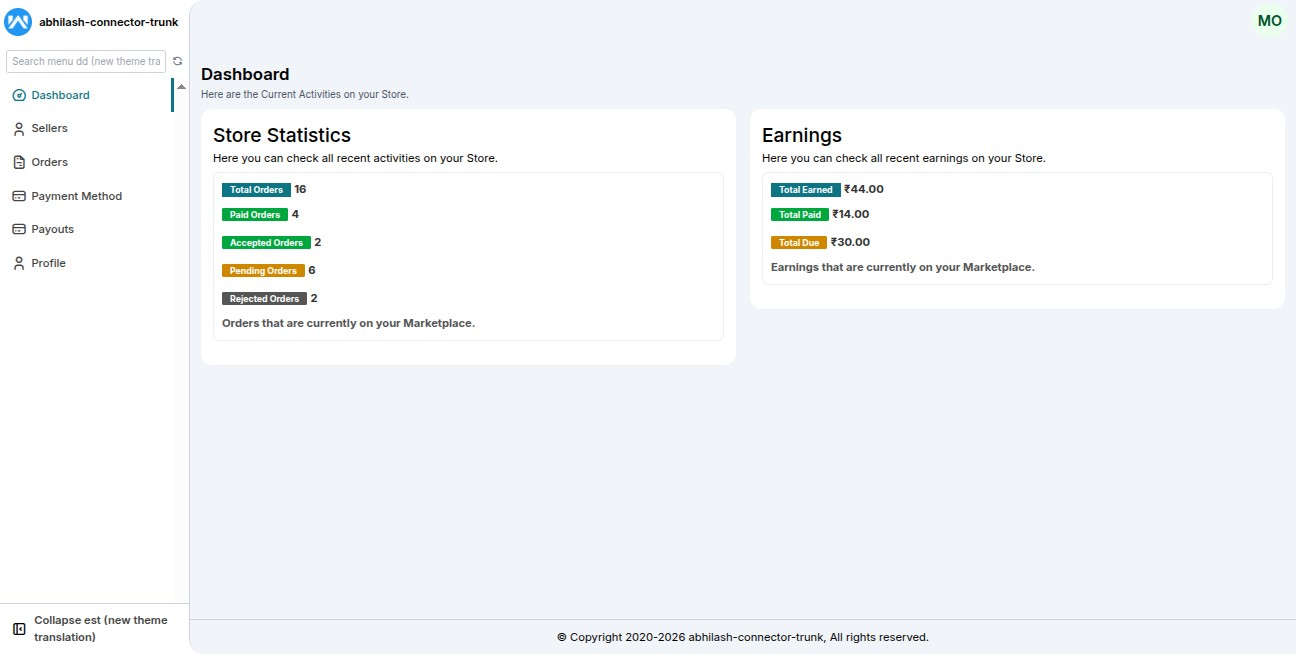
Sellers Section
- View seller requests
- Accept or reject requests
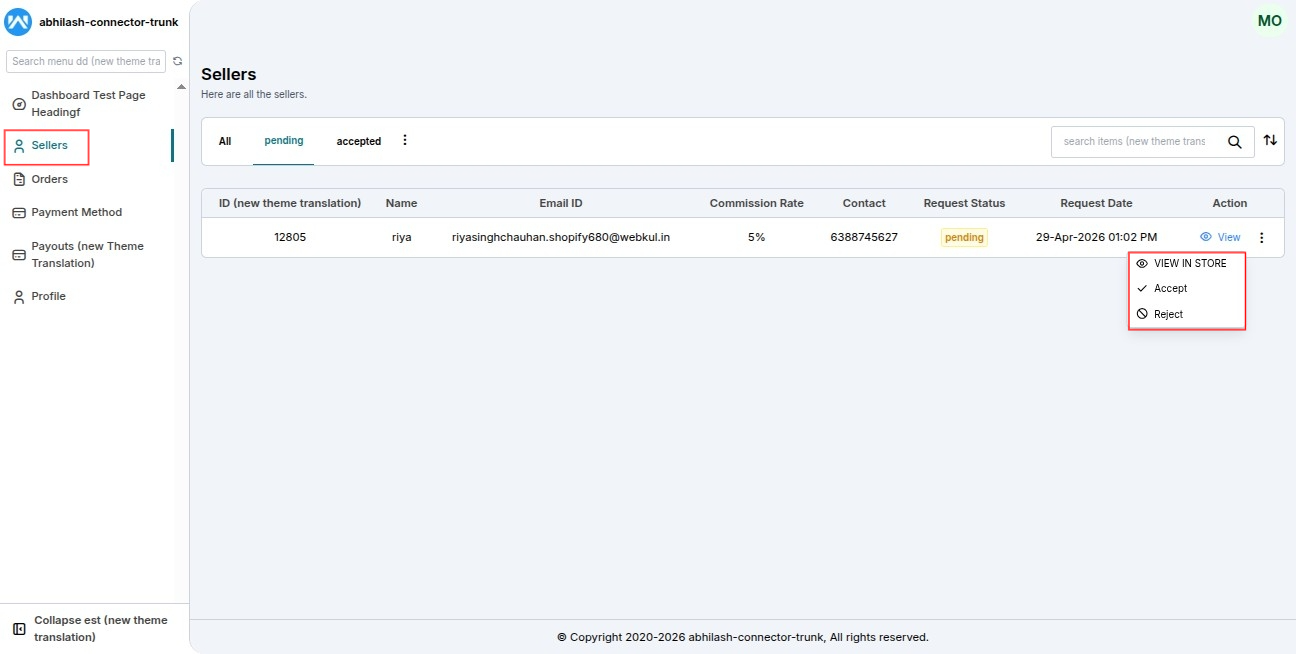
- View seller details
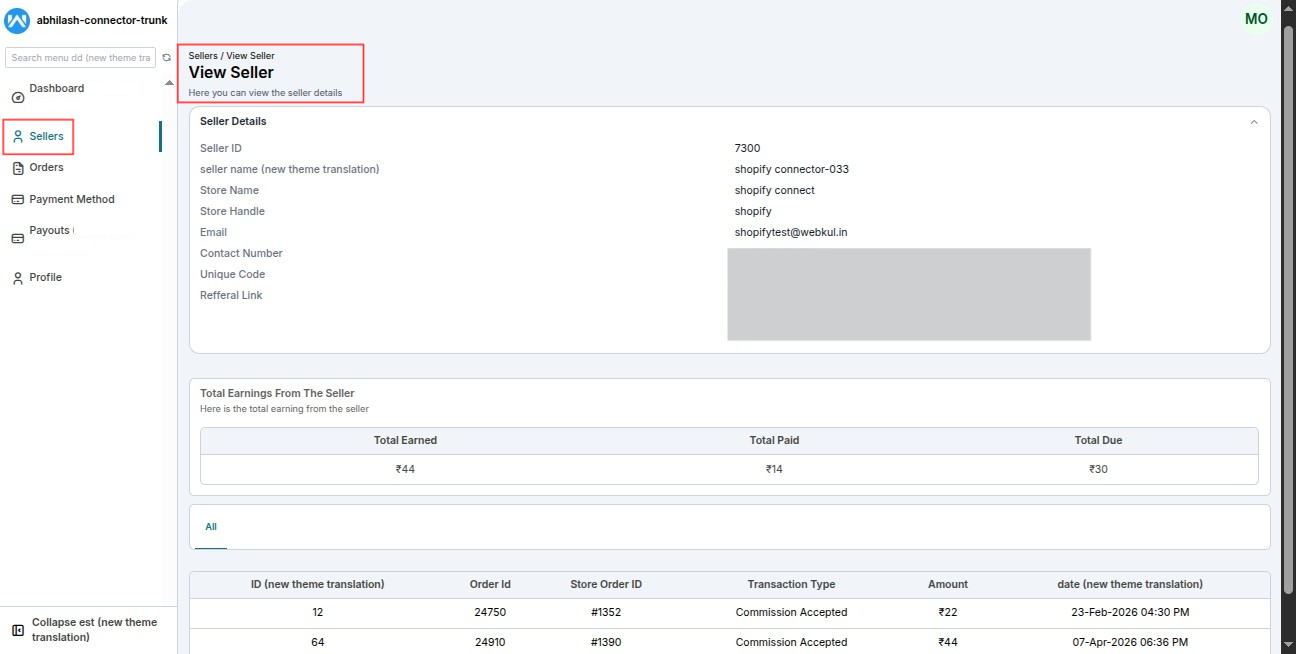
- Track earnings (Total, Paid, Due)
Payment Methods
- Choose from admin-enabled methods
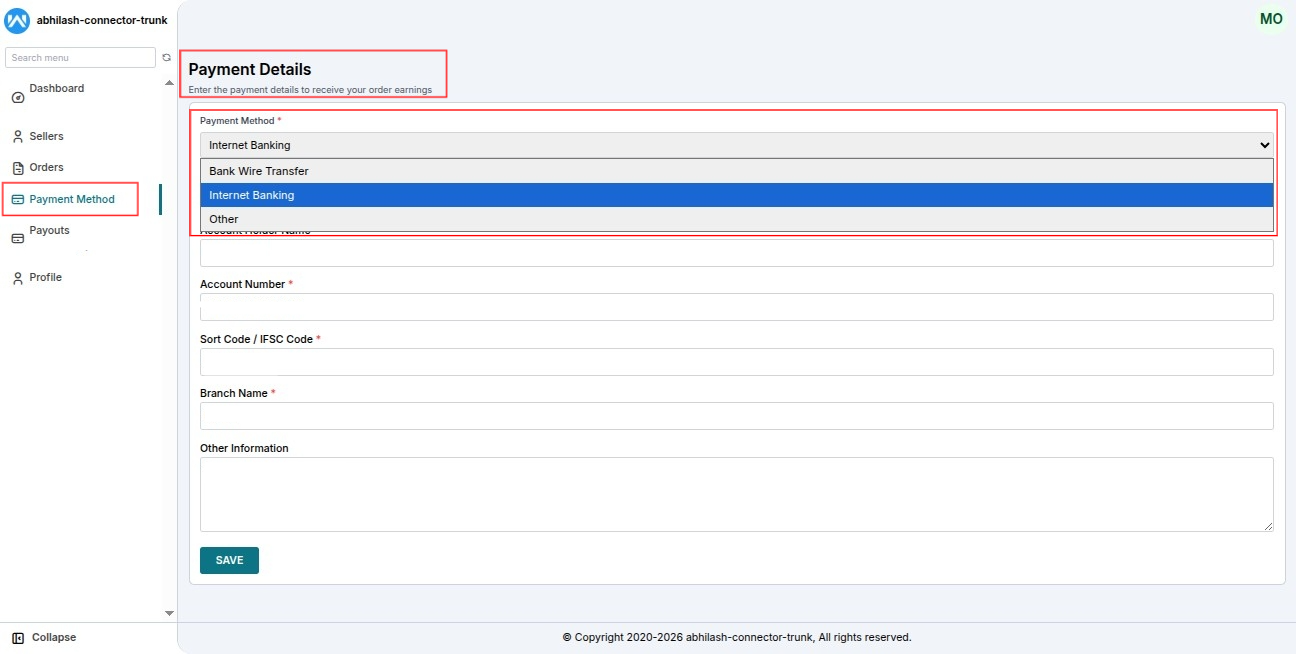
- Configure to receive payments
Payouts
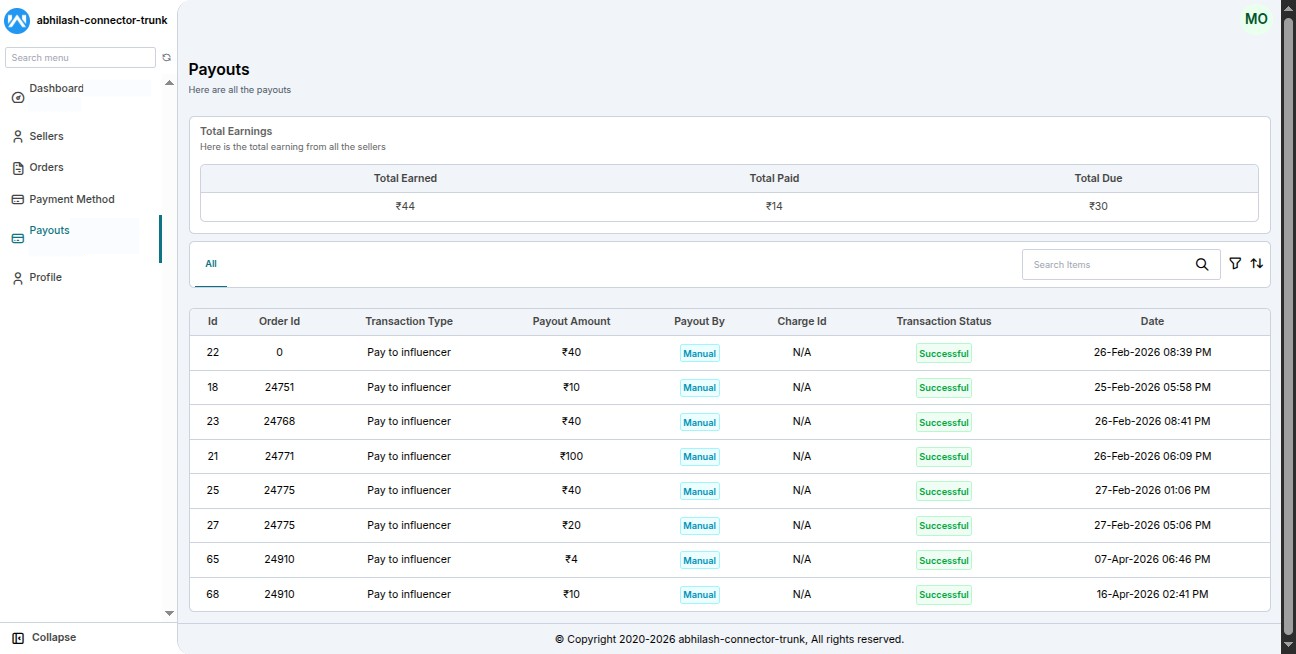
- Track total earnings
- View payout history
Profile
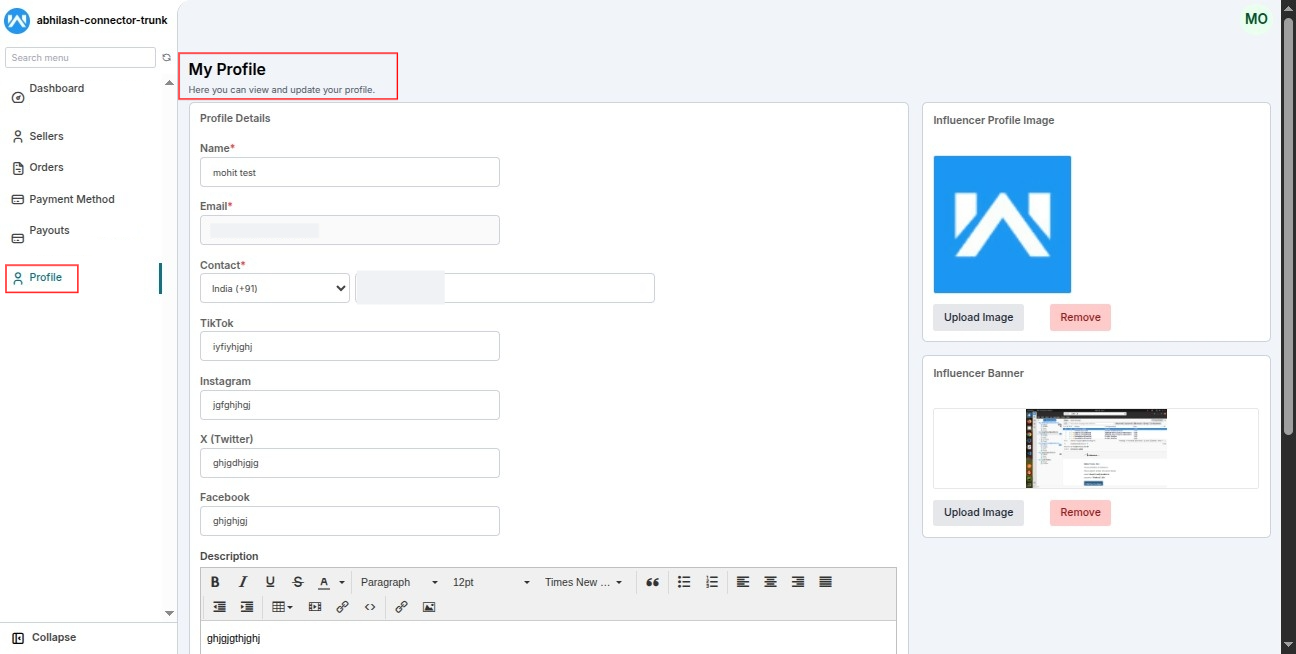
- Edit personal details
- Update profile information
Influencer Orders Listing on Admin and Seller End
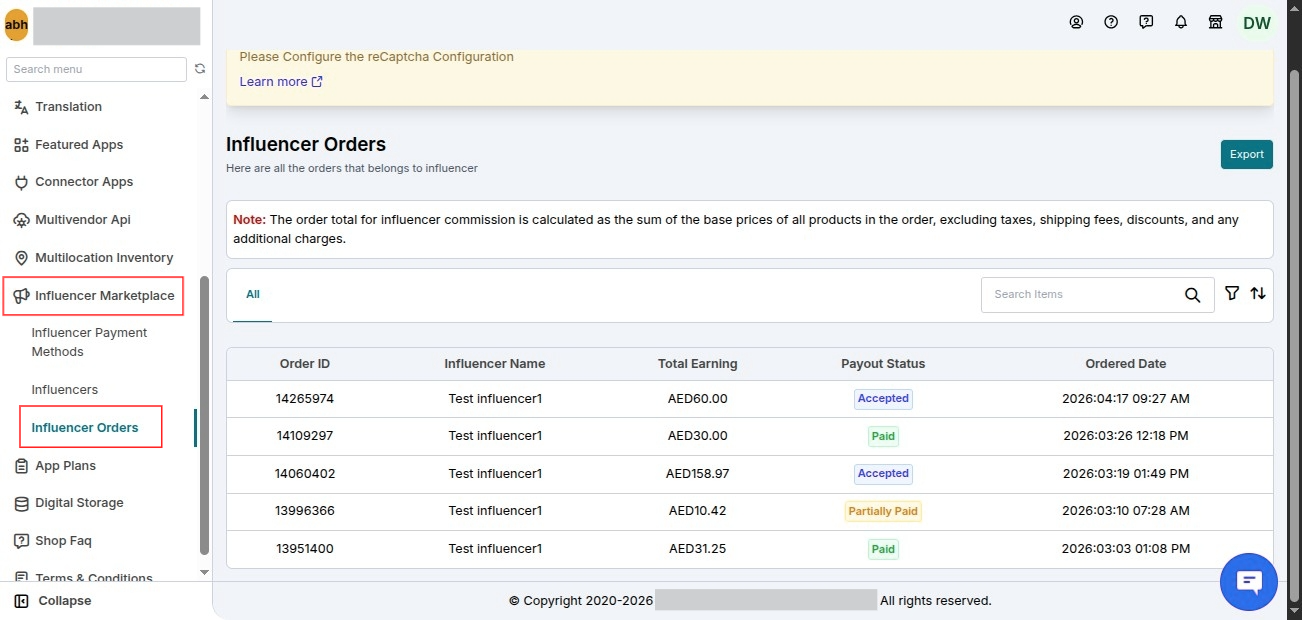
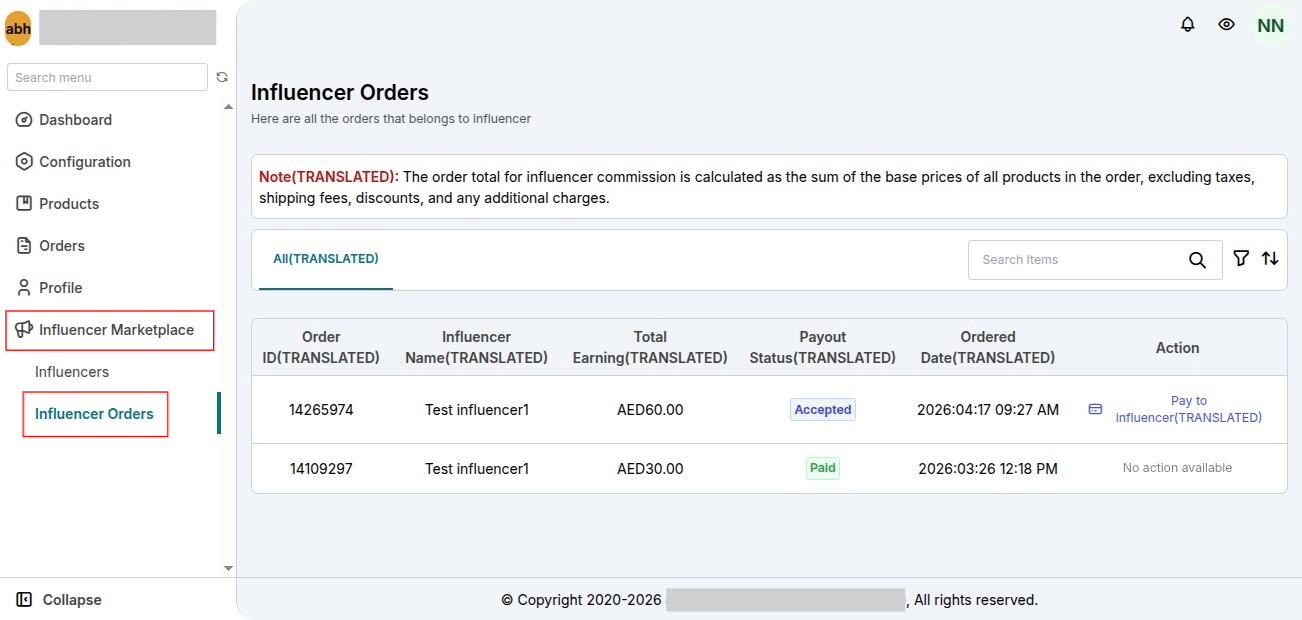
A new Influencer Orders listing section has been introduced for both the Admin and Seller panels. This feature allows marketplace users to easily track and manage orders generated through influencer referrals directly from their respective dashboards.
Admin Panel
The Admin can view all influencer-generated orders from a dedicated listing section, making it easier to monitor order activity and manage influencer-related sales across the marketplace.
Seller Panel
Sellers can access a separate Influencer Orders listing to view orders generated through influencers associated with their products. This helps sellers track influencer performance and monitor sales generated through influencer marketing campaigns.
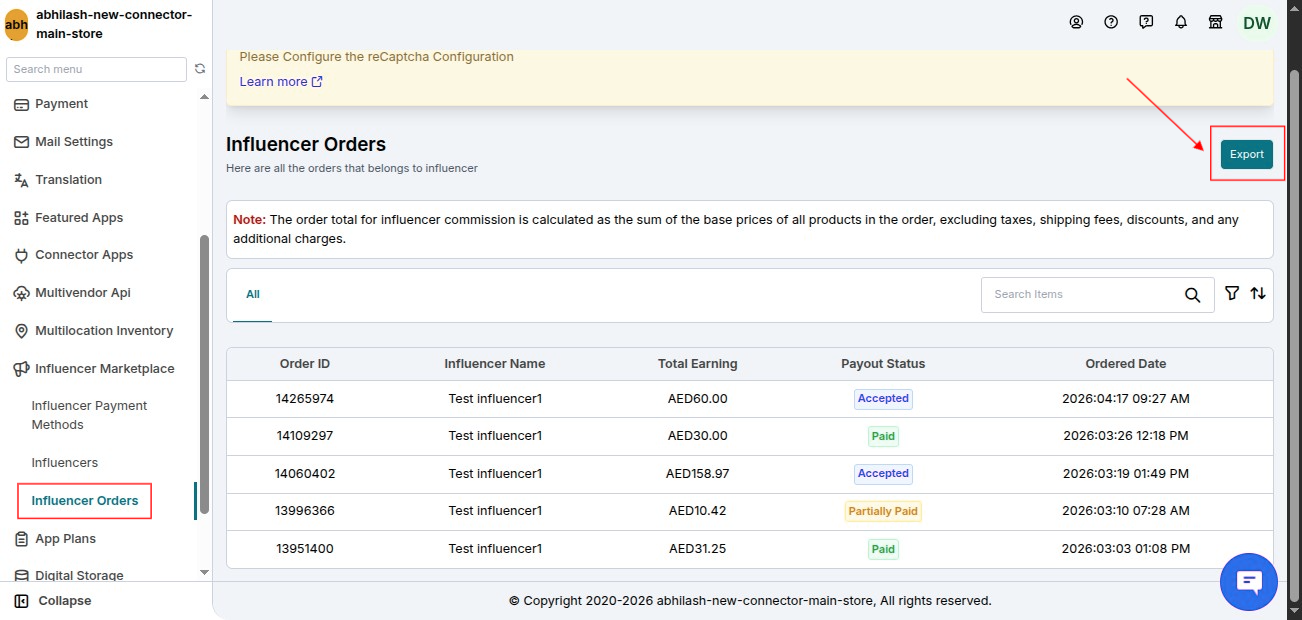
Export Commission Data from Order Listing (Admin)
The Order Listing page at the Admin end has been enhanced with a new Export Commission functionality. Using this feature, Admin can export influencer commission details directly from the order listing for reporting, analysis, and management purposes.
This makes it easier to maintain commission records and review influencer earnings associated with marketplace orders.
Storefront Influencer Listing Configuration
A new configuration has been introduced to display the Influencer Listing on the storefront.
To enable this feature, navigate to:
Configuration → Influencer Marketplace Configuration → Show Influencer Listing on Storefront
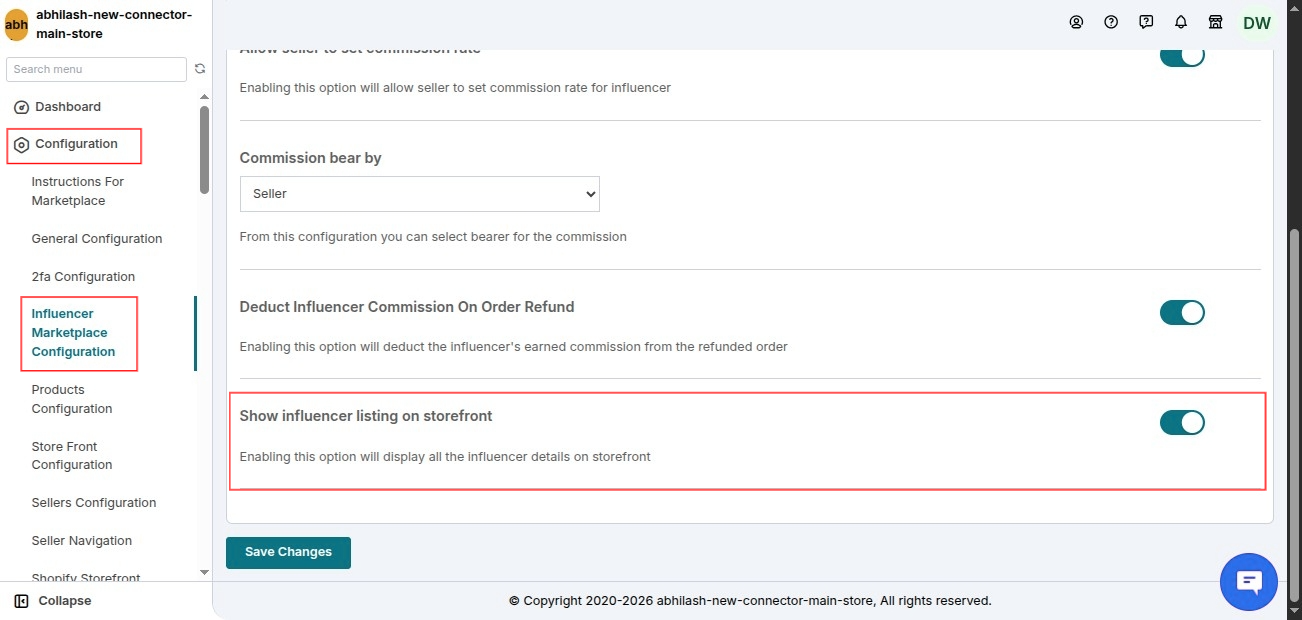
Enable this configuration and then generate the influencer storefront assets from:
Admin Dashboard → Configuration → Storefront Configuration
Once the configuration is enabled and the assets are generated successfully, the influencer listing page will become visible on the storefront, allowing customers to browse and explore registered influencers directly from the marketplace.
Conclusion
The Influencer Marketplace add-on enhances your multivendor store by enabling seamless collaboration between sellers and influencers.
With:
- Flexible commission settings
- Transparent earnings tracking
- Easy payment management
It creates a win-win ecosystem for all parties.
Whether you're an admin, seller, or influencer, this feature simplifies the entire process efficiently.
Need Help?
If you face any issues:
- Email: support@webkul.com
- Or create a ticket at Webkul UV Desk
SCHEDULE DEMO
Click here to Schedule the demo of Multivendor marketplace App for Shopify