

Appearance
User Guide for Minimum Purchase Quantity
Minimum Purchase Quantity: We have introduced this new feature in our MultiVendor Marketplace App for Shopify.
What is the Minimum Purchase Quantity?
It is the minimum quantity of goods a customer needs to buy/order to make the purchase successful. If the customer is unable to meet the set requirement, the order can't be placed.
Need to implement the same?
- Increase revenue by incentivizing your customers to place an order in bulk.
- Products get sold quickly hence a great inventory turnover.
- A minimum purchase quantity helps to ensure that there is sufficient demand for your products to start production.
Check the below video of the Minimum Purchase Quantity:
Let's have a look at how we can configure the same in our MultiVendor Marketplace App.
Configuration: Admin Interface
There are two configurations that need to be done by the admin: Enabling the option & code-pasting.
For this, visit:
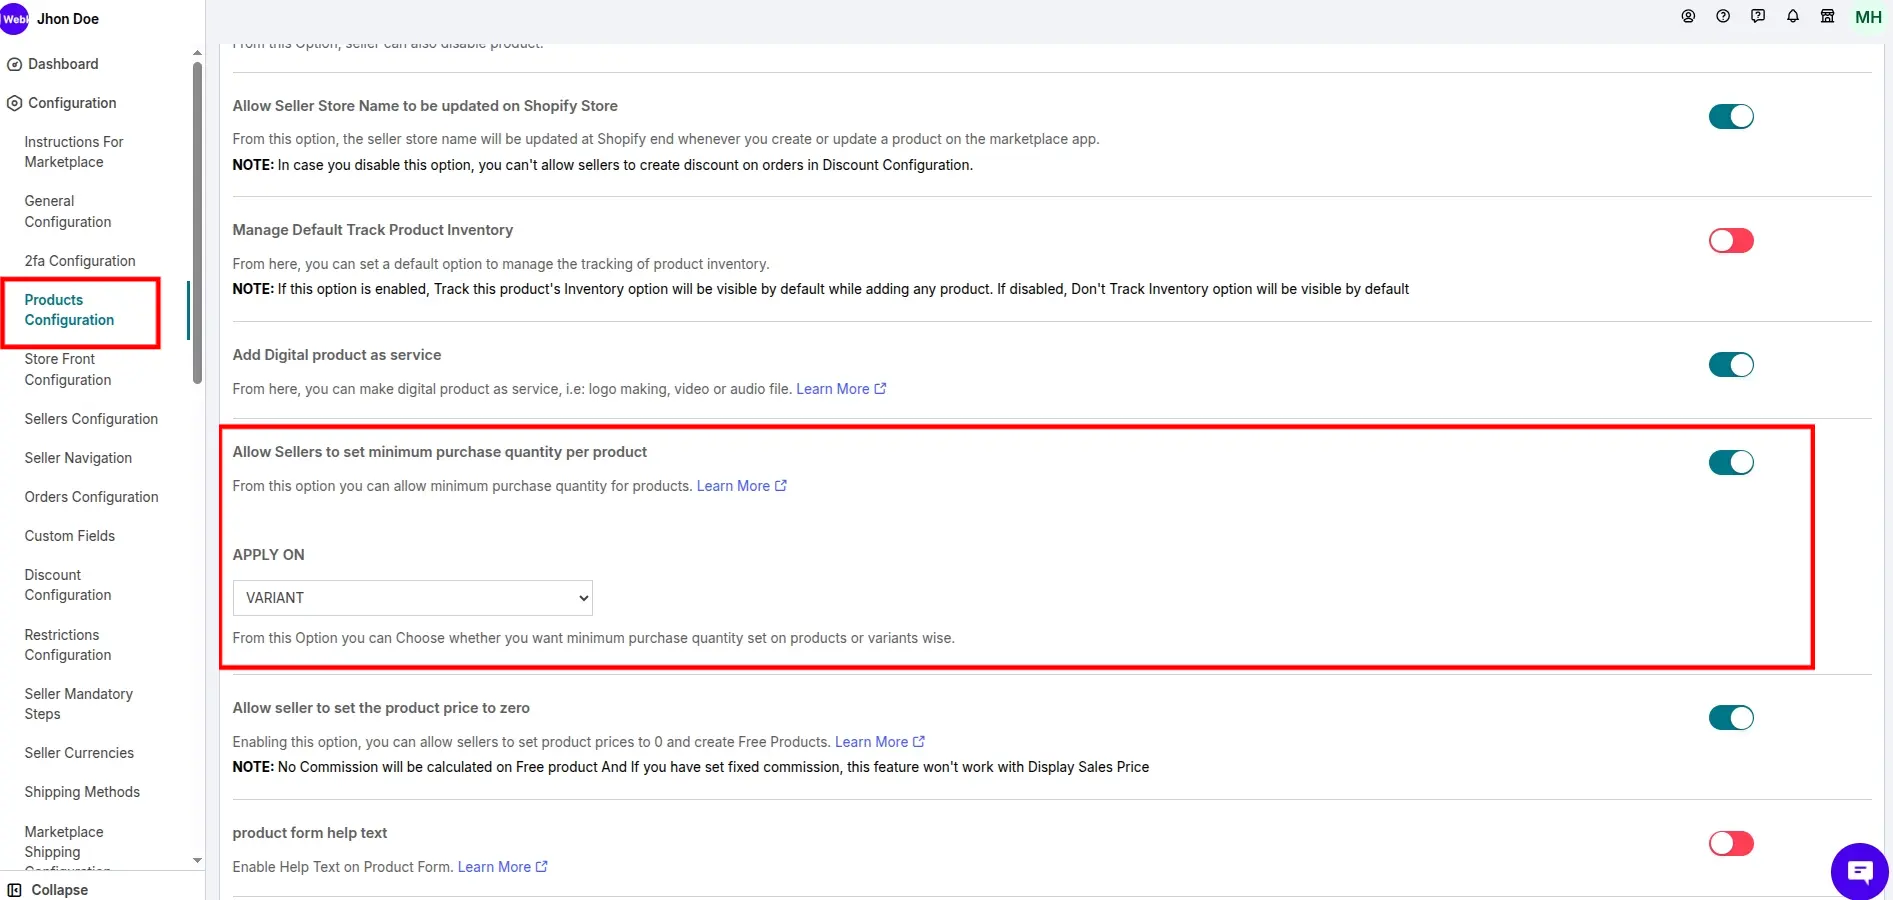
Multivendor Marketplace Admin Panel > Configuration > Products Configuration:
Here, enable the following option: ALLOW SELLERS TO SET MINIMUM PURCHASE QUANTITY PER PRODUCT. Further, you need to choose whether you want to set minimum purchase quantity for a product or for the variant.
Once it's done, let move to code pasting.
For this visit:
Multivendor Marketplace Admin Panel > Configuration > Instructions for Marketplace

Here, you'll have a code that you need to paste in the product-template.liquid file.
How to find the product-template.liquid file?
- From your Shopify admin, go to Online Store > Themes.
- Further, click on Actions > Edit code.
Search the file name and paste this code. Refer:
liquid
<div id="min_purchase_quantity_div" data-productid="{{ product.id }}"></div>
Important Note:
For this feature to work, you have to enable the Quantity Selector for your store theme. The quantity selector shouldn't be drop-down type.
How to add a quantity selector to product pages?
- From your Shopify admin, go to Online Store > Themes.
- Further, click on Customize.
- Open the Product Page from the drop-down menu (refer to the image provided below).
- You will see the Product pages tab in the theme editor, click on that.

- Check the Show quantity selector checkbox.
- Click Save.

How to add minimum purchase quantity to a product?
The minimum quantity can be added by the admin as well as the seller. Learn how:
Multivendor Marketplace Admin/Seller Panel > Products > Add Product
In the case of minimum product purchase quantity:
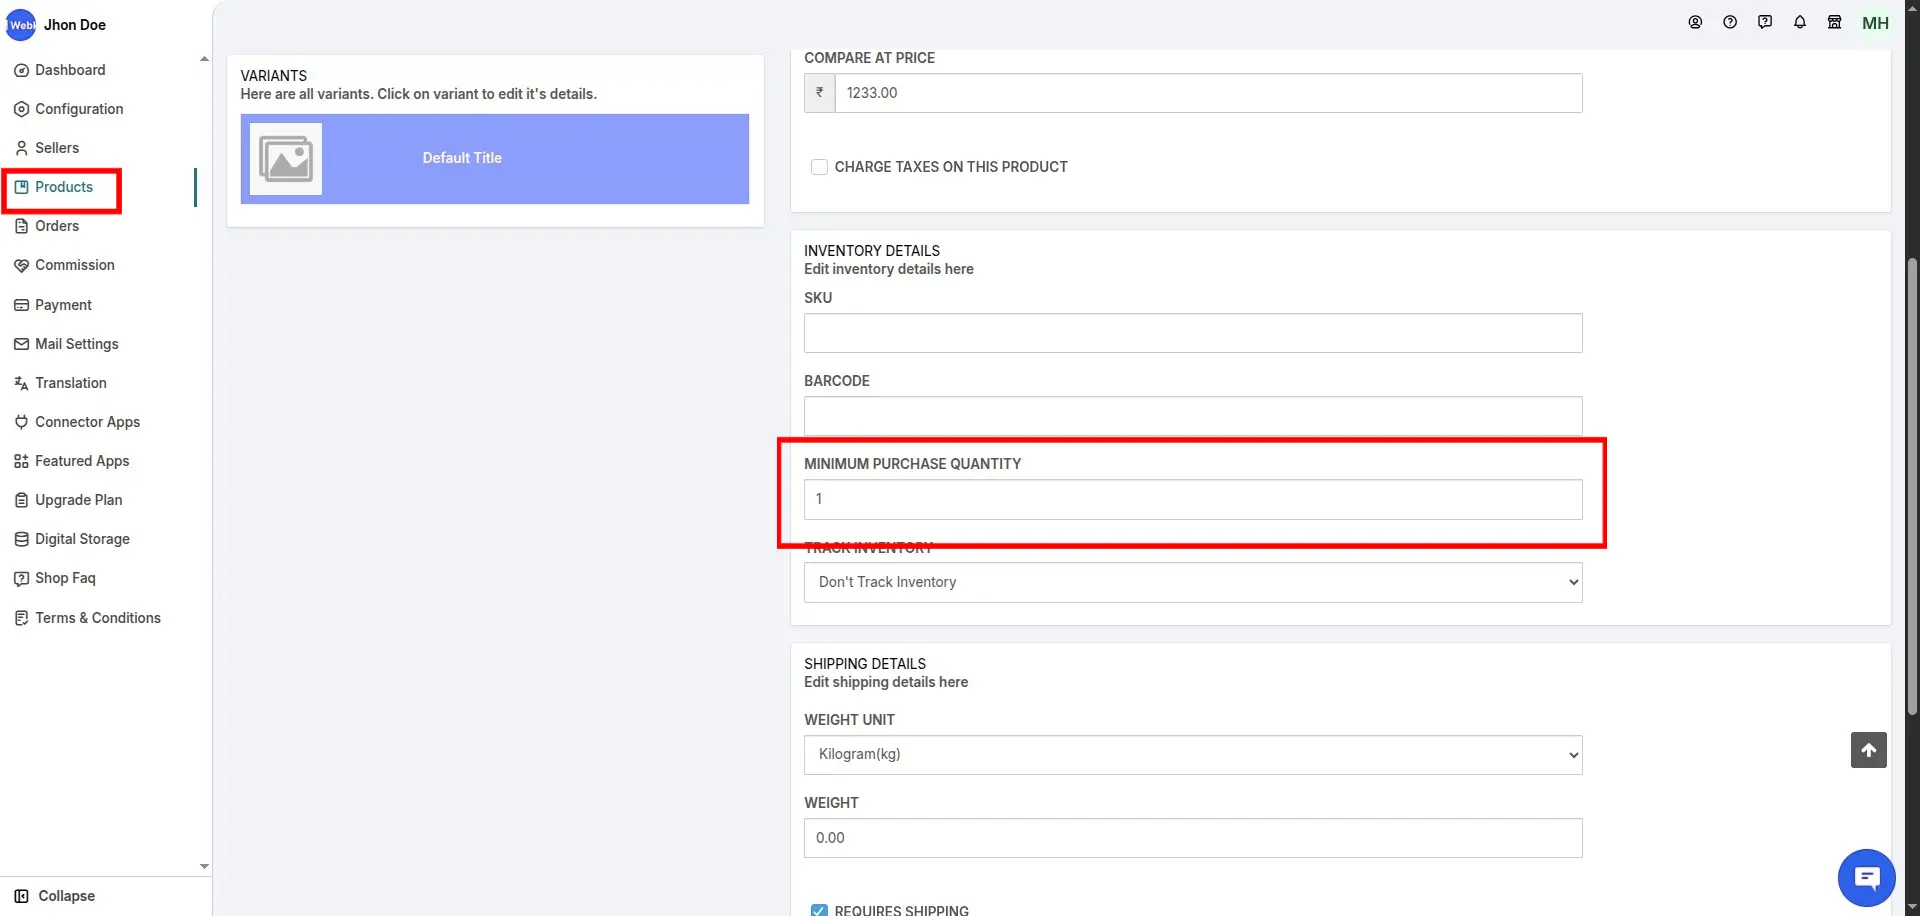
Under the heading Inventory Details, you'll have an option to set the quantity. Enter the quantity & save the changes. Refer:

Next, in the case of minimum variant purchase quantity:
Multivendor Marketplace Admin/Seller Panel > Products > Under Action, click on Edit product > Under Variant Details, click on Edit.

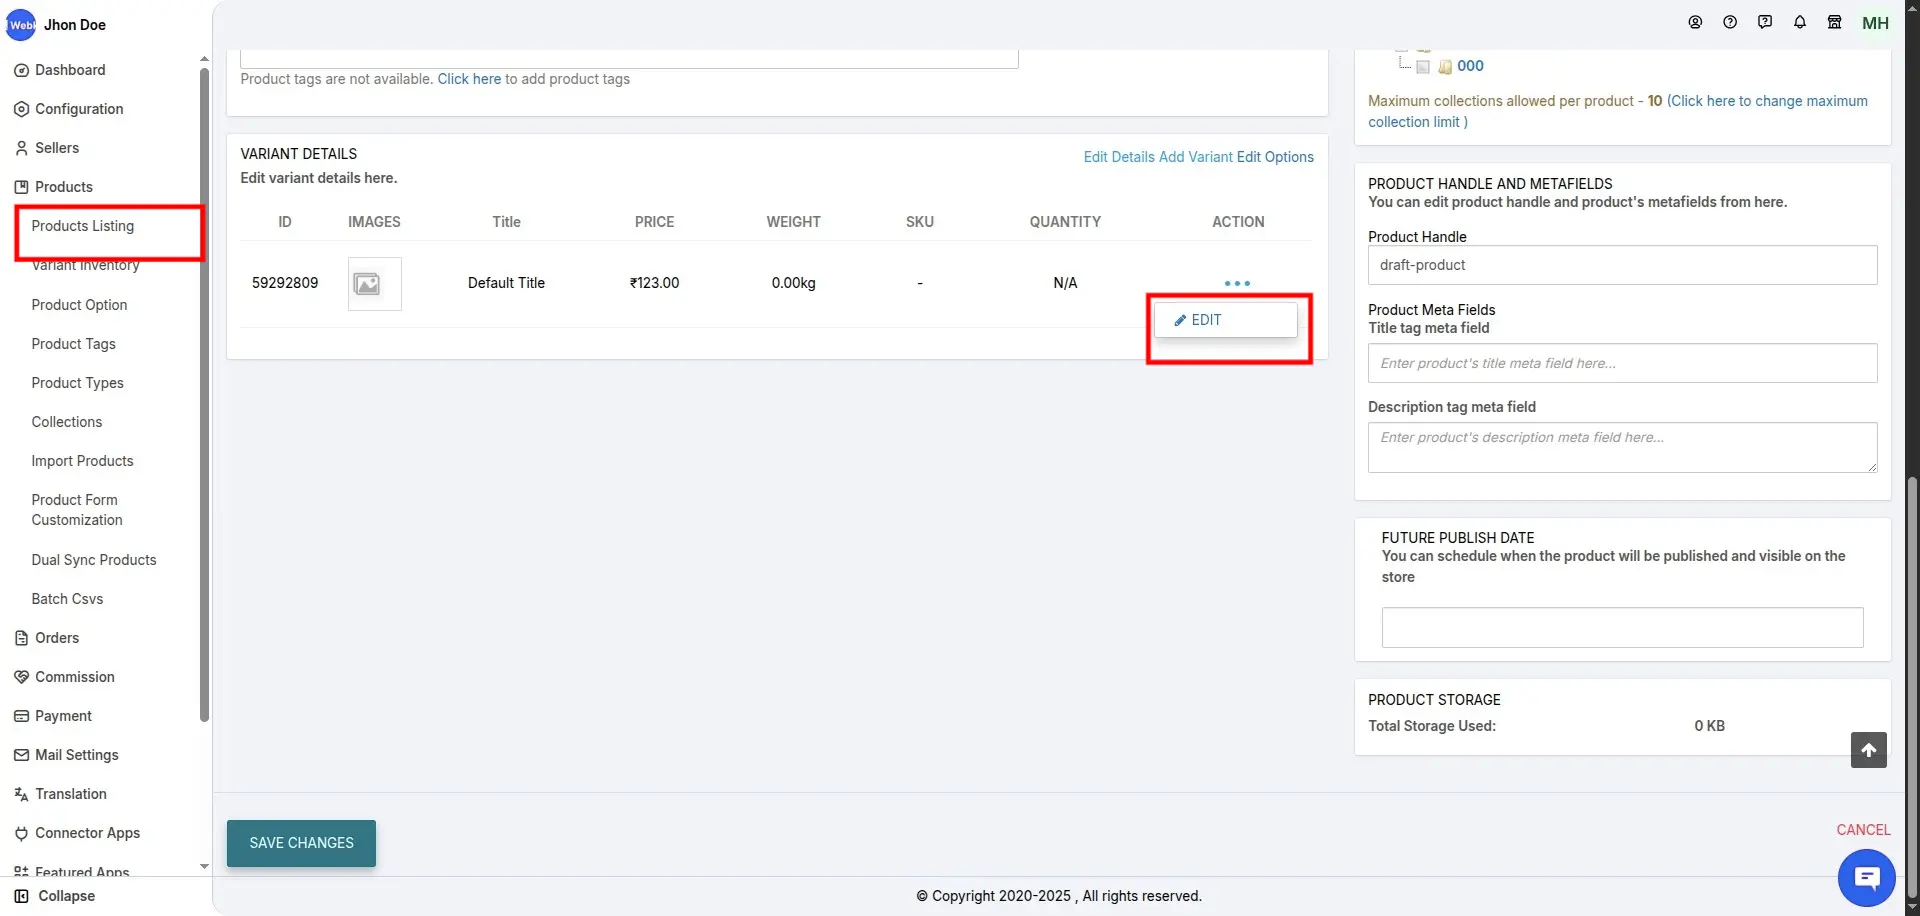
Further, under the heading Inventory Details, you'll have the option to edit the set minimum quantity.
Frontend
On the product description page, your customers won't be able to reduce the quantity value lesser than the configured. The value can only be increased. Refer:

Moreover, in any case, if the customer adds a lesser quantity than the required value, he won't be able to checkout. The following message will be thrown on the cart page:

Also Read:
Minimum Purchase Amount: Multi-vendor Marketplace for Shopify
SCHEDULE DEMO
Click here to Schedule the demo of Multivendor marketplace App for Shopify