

Appearance
User Guide for Japanese Shipping
Japanese Shipping: Multi-vendor Marketplace for Shopify
We are delighted to announce a new Japanese Shipping feature in our Multivendor Marketplace App . Now, sellers can easily manage shipping and generate shipping labels directly from their seller panel.
This feature is specially designed for merchants operating in Japan and includes integration with three major Japanese shipping carriers:
- Yamato Transport
- Sagawa Express
- Japan Post (Yu-Pack)
Key Benefits
- Easy shipping management for Japanese sellers
- Direct shipping label generation
- Integrated tracking details
Admin Configuration
To enable Japanese Shipping, the admin needs to follow the steps below:
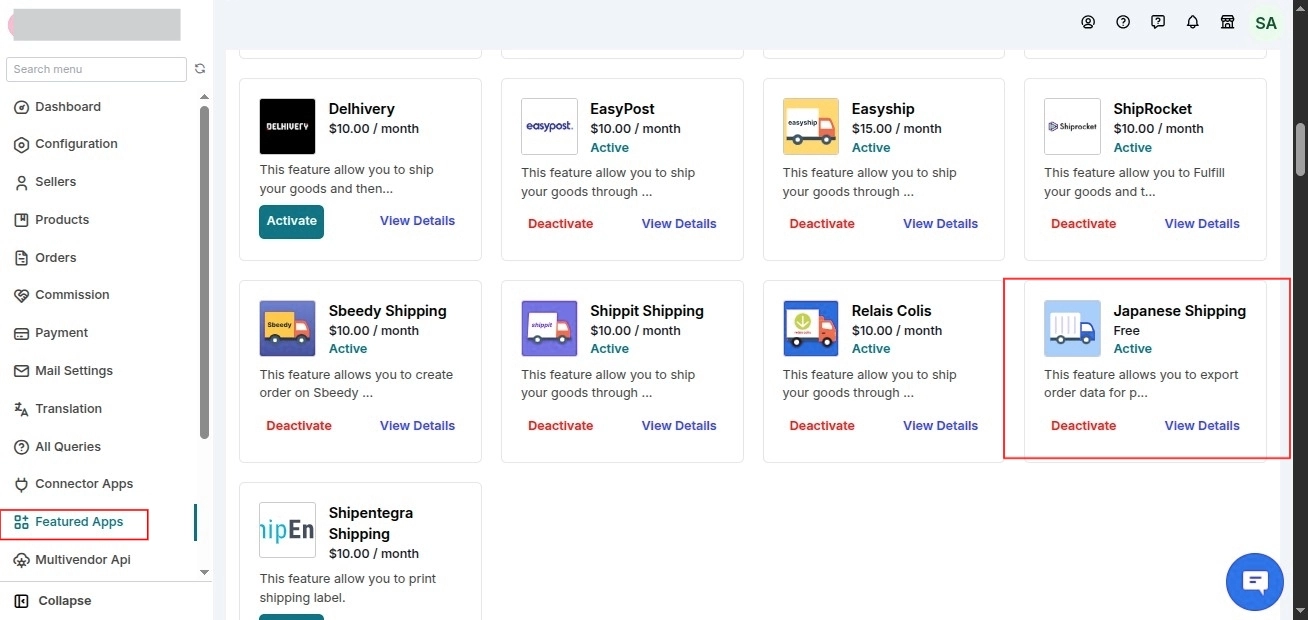
Step 1: Enable Feature App
Navigate to:
Marketplace Admin Panel → Feature App → Enable Japanese Shipping
Once enabled, proceed to the next configuration.
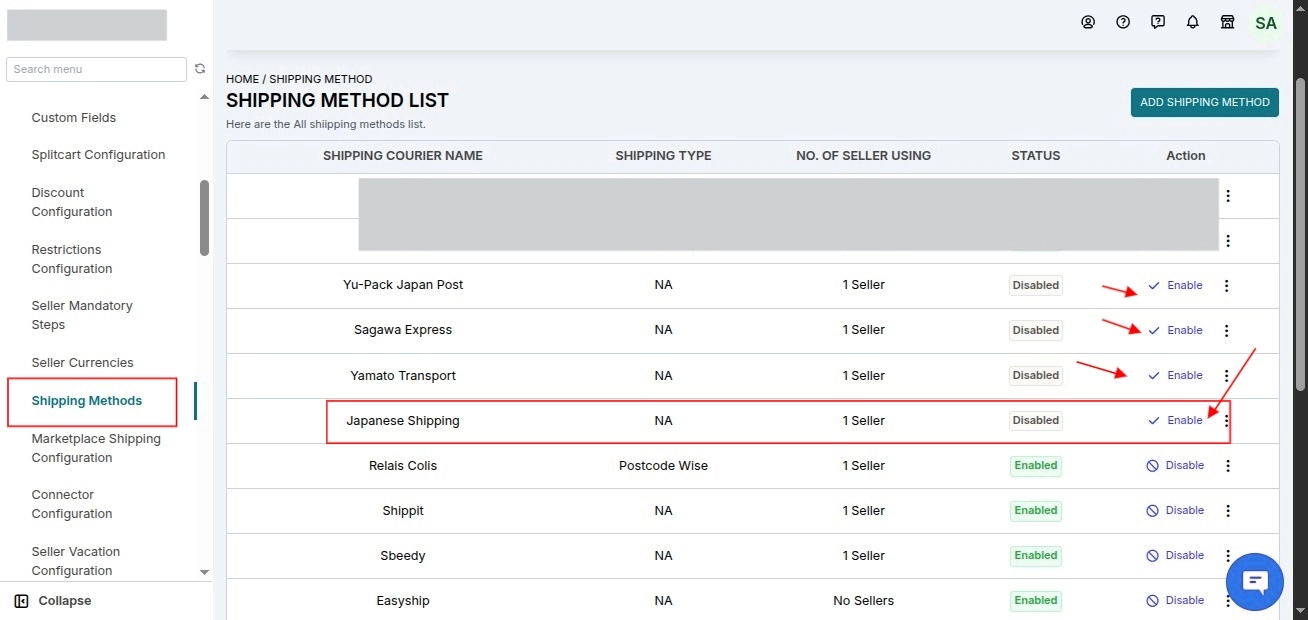
Step 2: Enable Shipping Method
Go to:
Configuration → Shipping Method
Here, the admin must:
- Enable Japanese Shipping
After enabling, options to activate the three shipping carriers will appear:
- Yamato Transport
- Sagawa Express
- Yu-Pack (Japan Post)
The admin can enable the required carriers from here.
Note: The carrier options will only appear after Japanese Shipping is enabled.
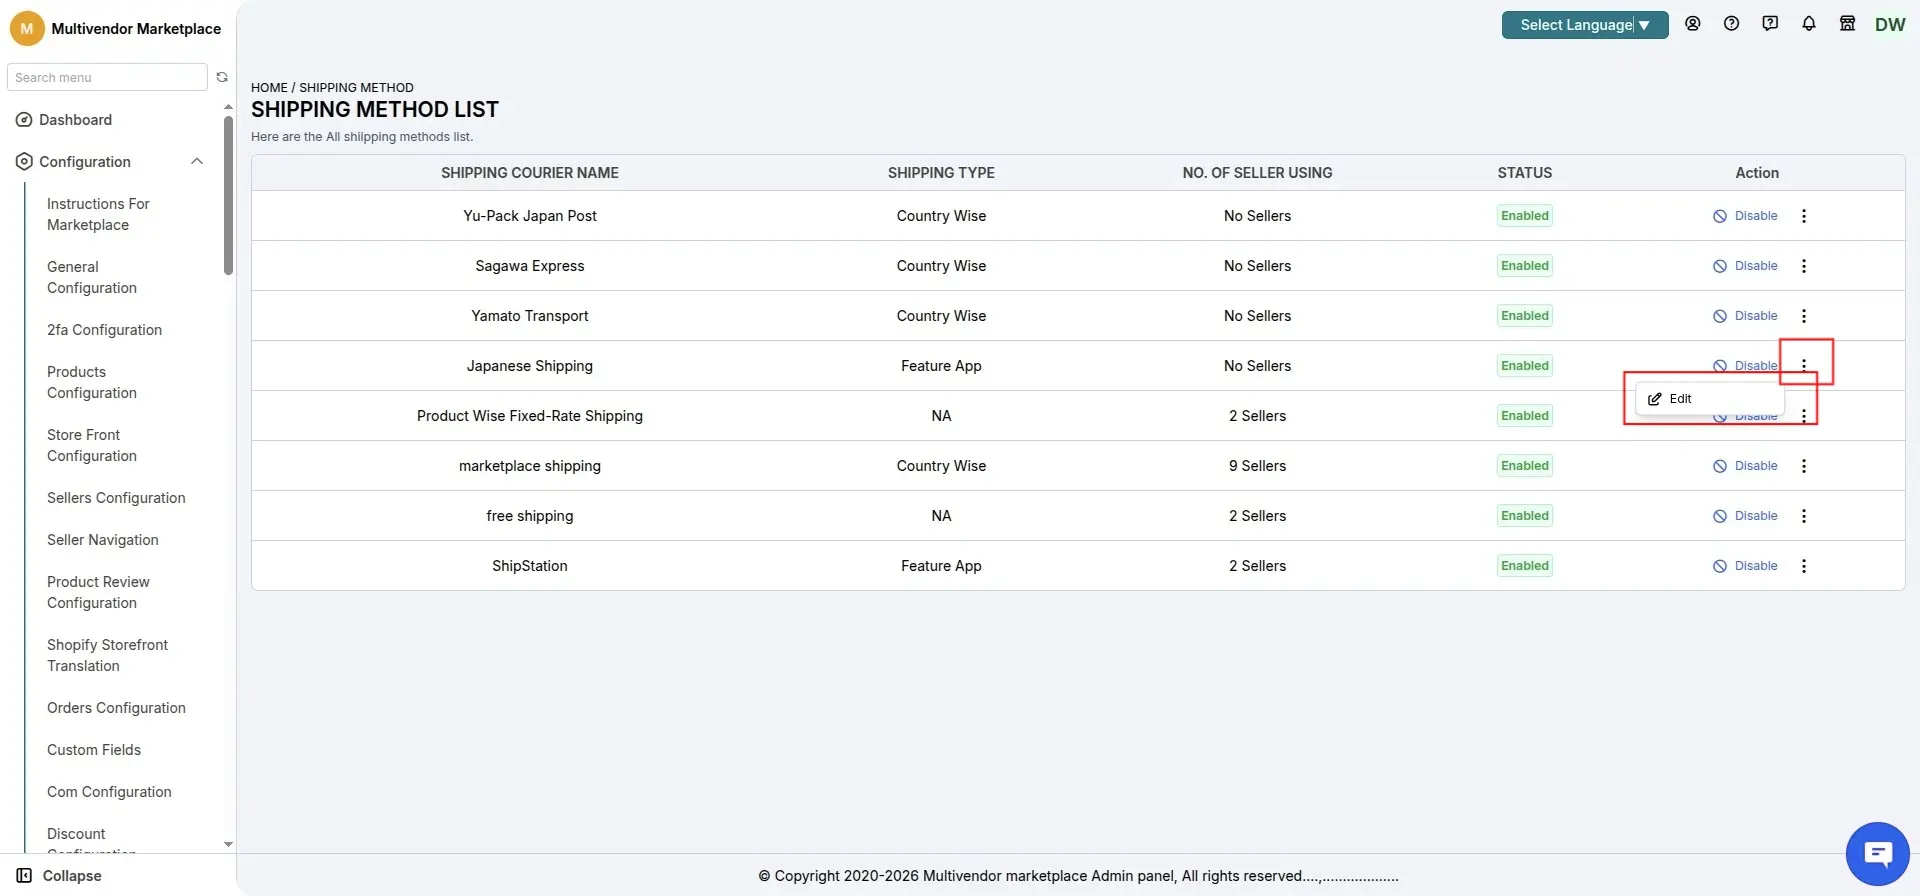
Shipping Carrier Configuration and Rate Calculation
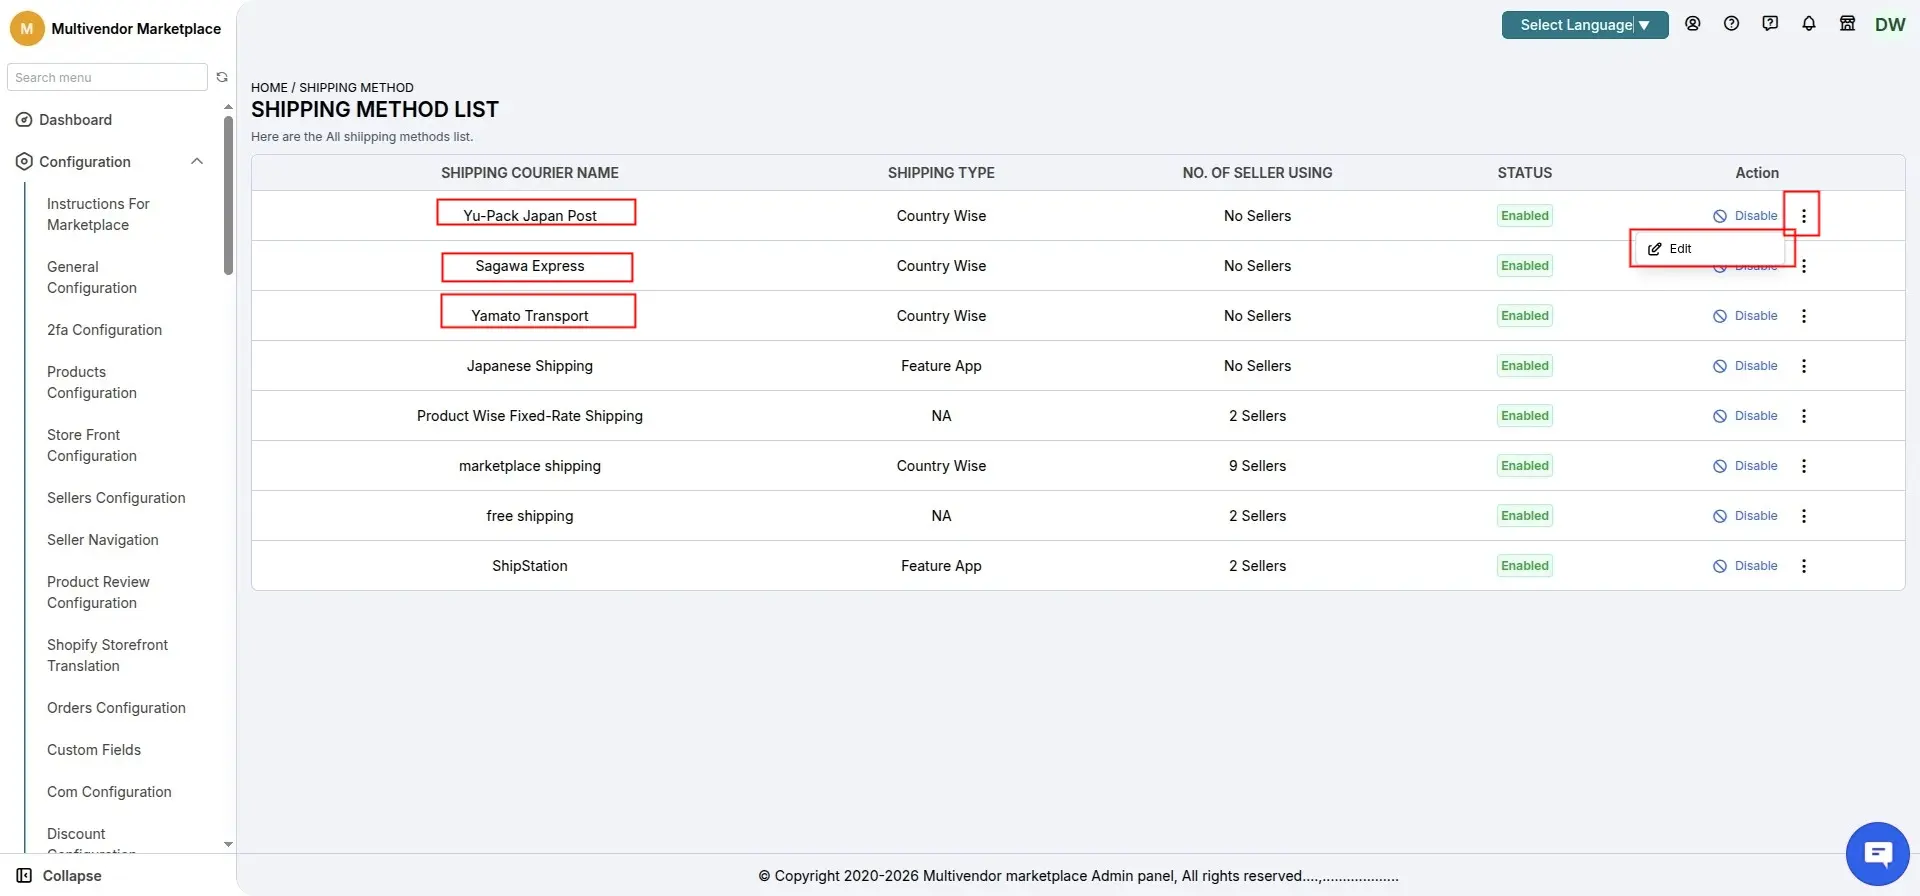
Click on the three dots to Edit the Japanese Shipping.
Here, the Shipping carrier field type for fulfillment configuration will be available.
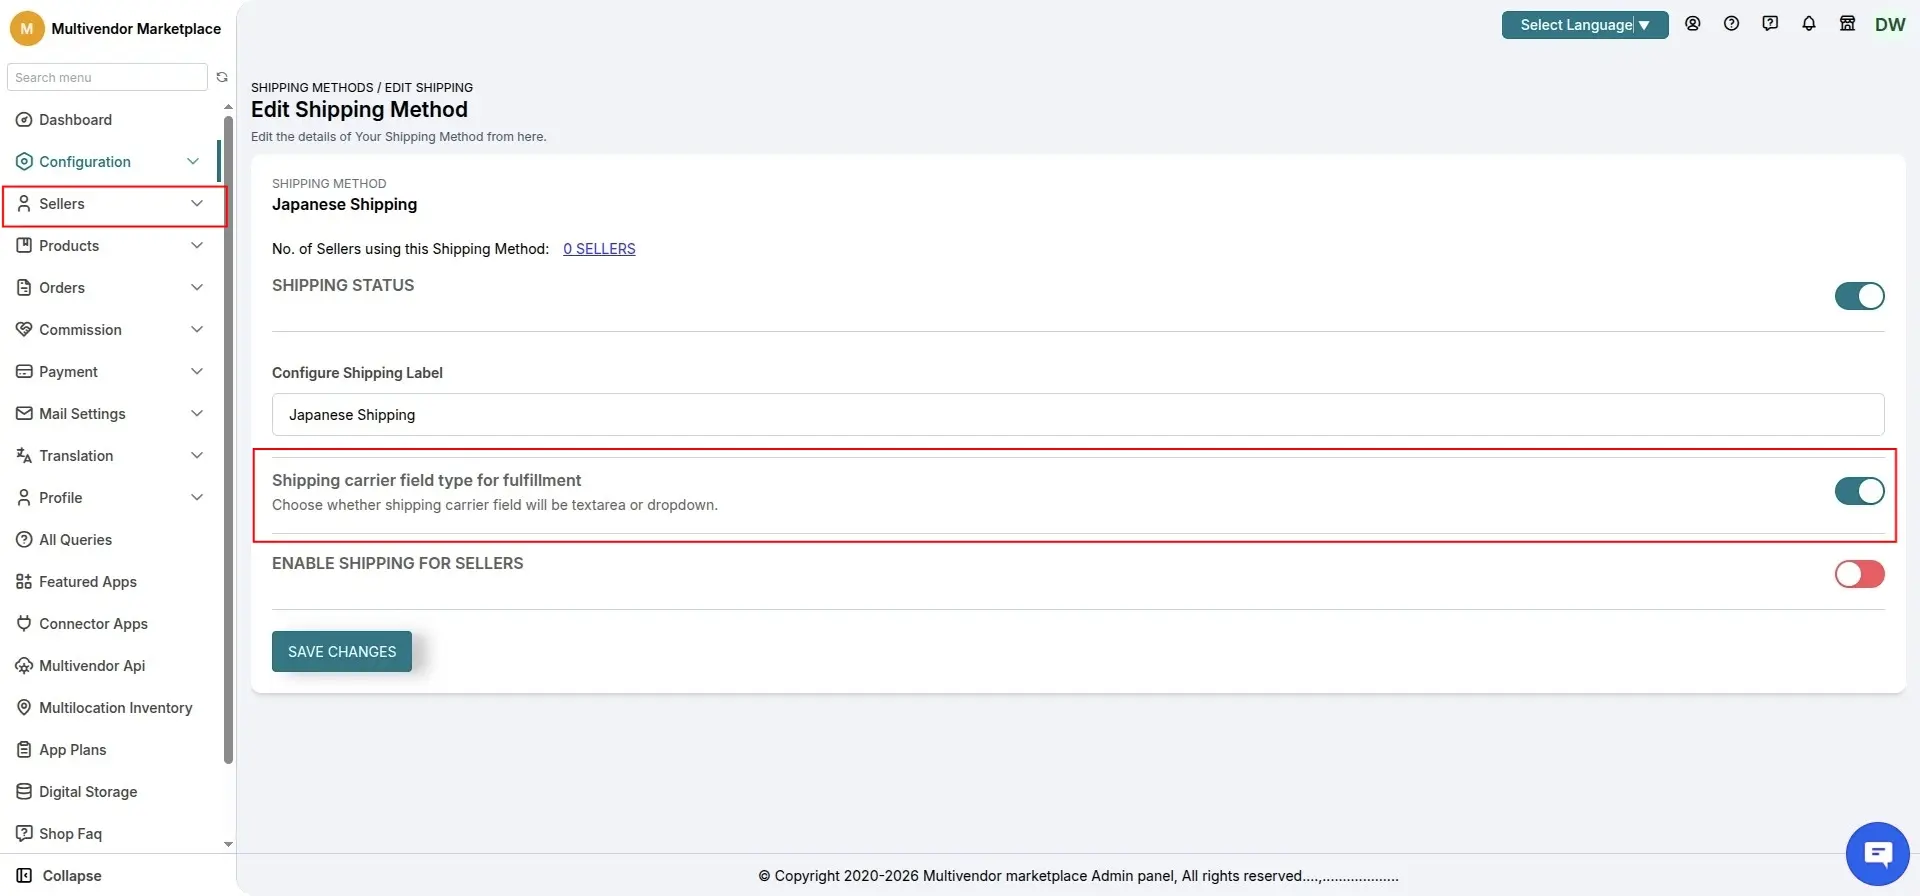
When this option is enabled, the selected carrier will be available as a shipping carrier during order fulfillment.
Additionally, if a Tracking URL and Tracking Number are configured for the shipping carrier, these details will be automatically populated when the carrier is selected during fulfillment.
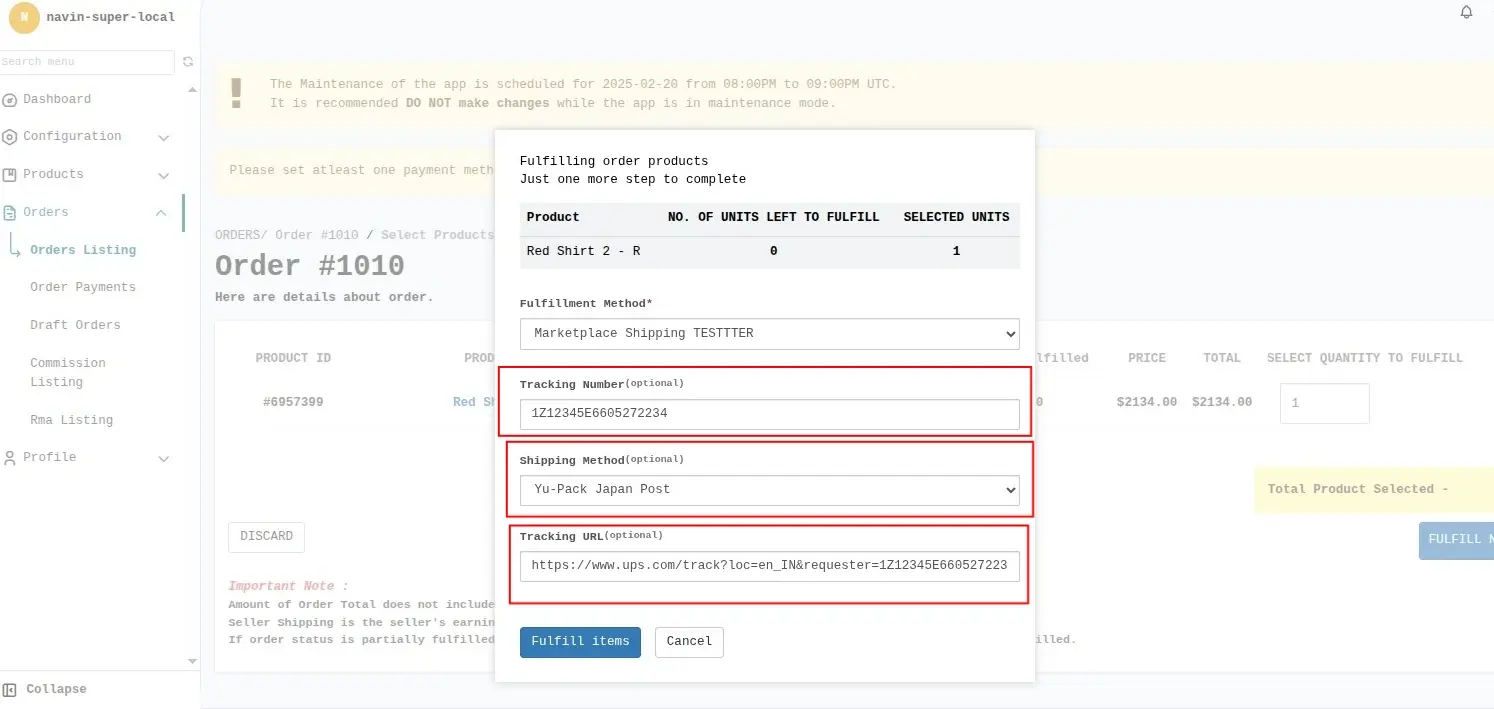
Also, while editing the Yu-Pack, Sagawa, and Yamato couriers:
You will have the option Use for Shipping Rate Calculation as a Shipping Method.
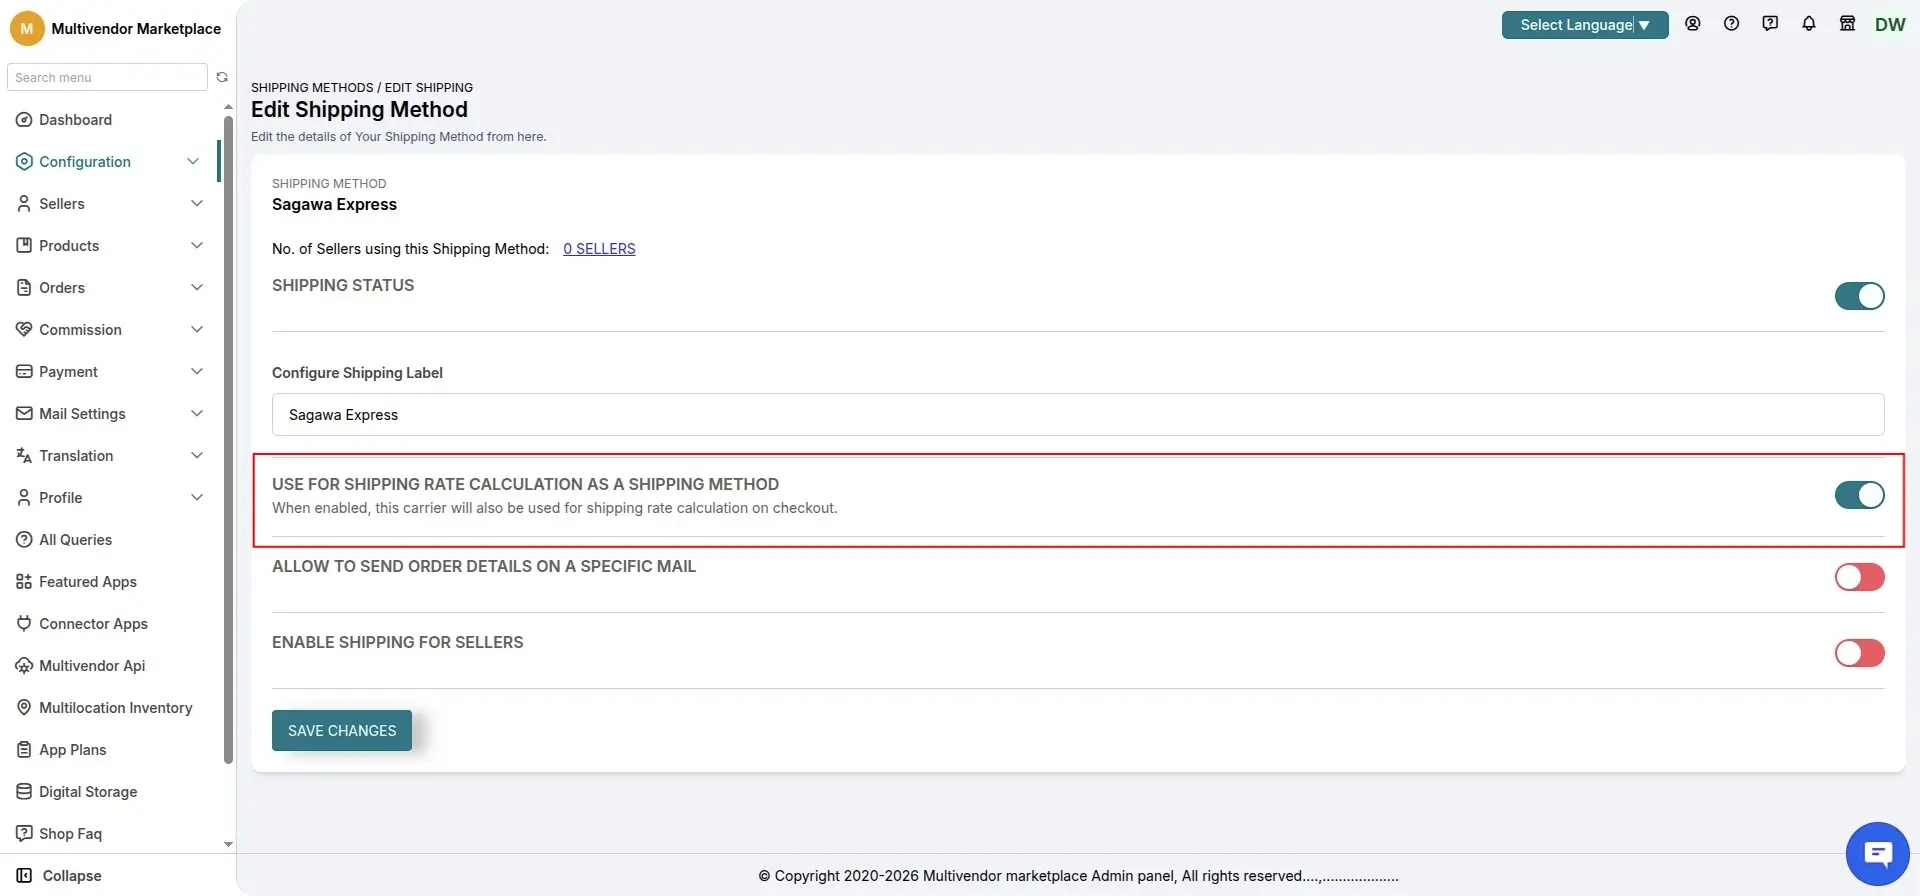
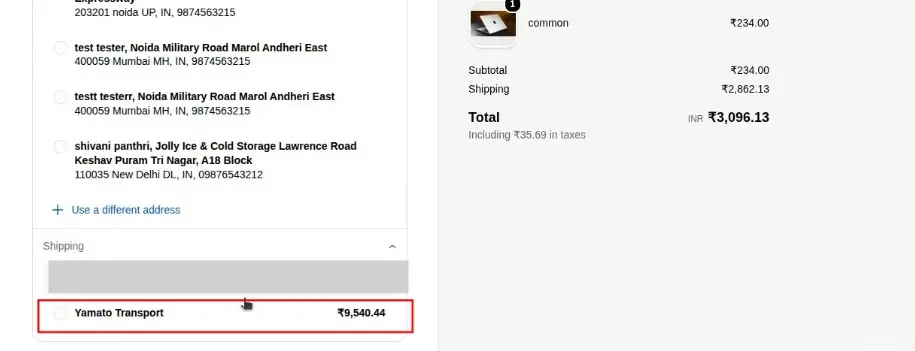
When Use for Shipping Rate Calculation as a Shipping Method is enabled, the carrier can be used during checkout to calculate the shipping rate based on the customer's postcode.
Seller End Configuration
Once the admin enables Japanese Shipping, sellers can configure it from their panel.
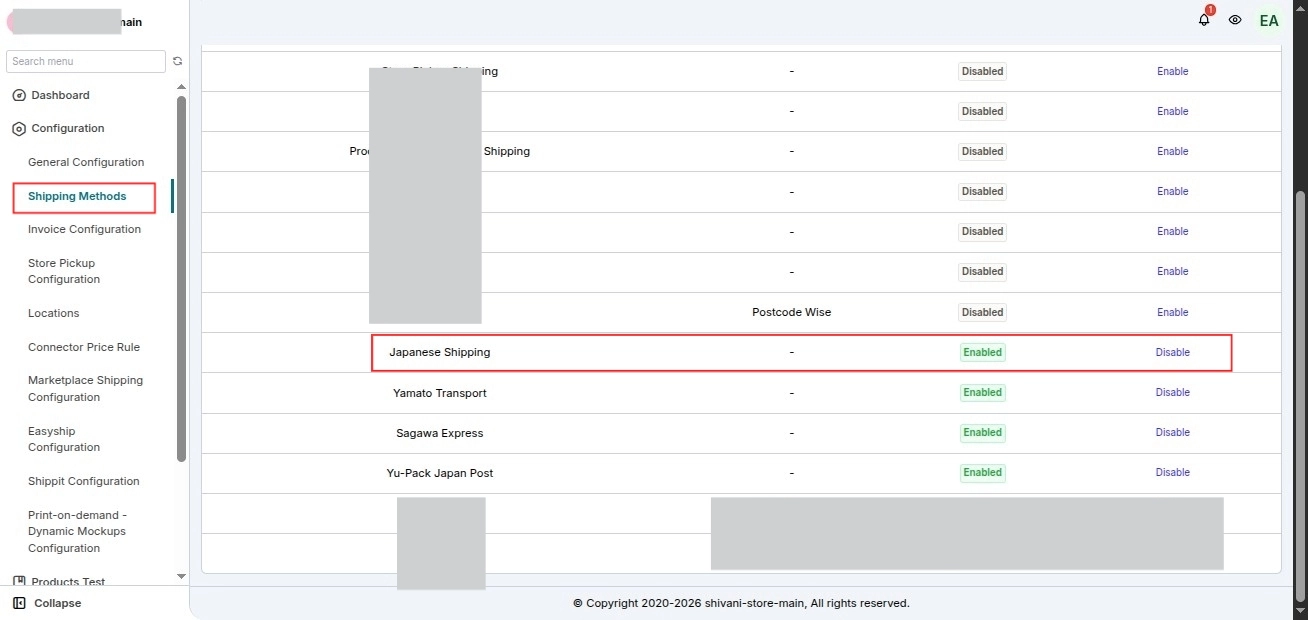
Step 1: Enable Japanese Shipping (Seller Panel)
Navigate to:
Seller Panel → Configuration → Shipping Method
Here, sellers will see Japanese Shipping Method.
They need to enable it and select the carriers they want to use (from those enabled by the admin).
Step 2: Create Shipping Label Data
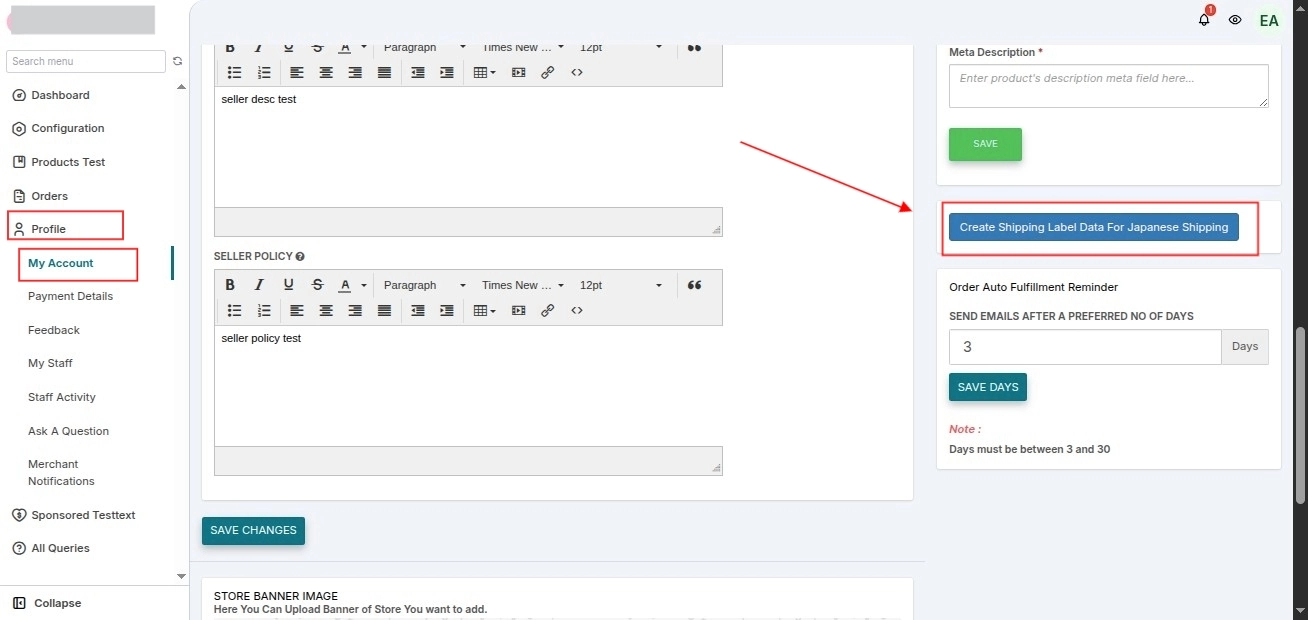
After enabling the shipping method:
- Go to My Account
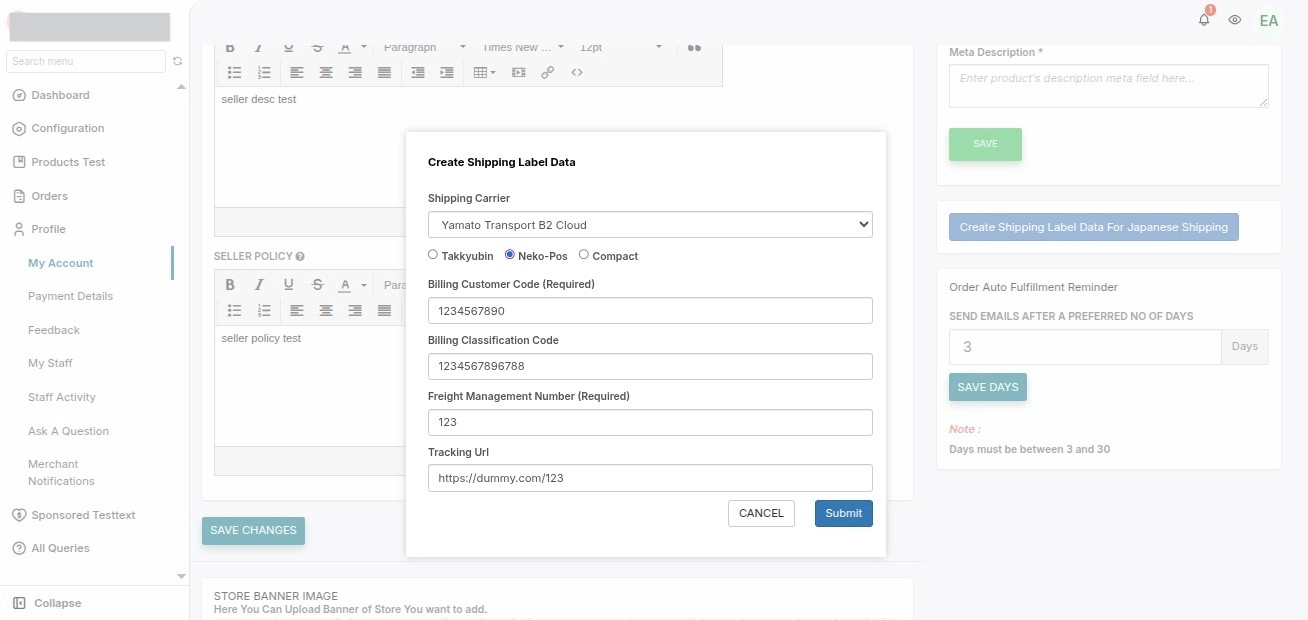
- Click on Create Shipping Label Data for Japanese Shipping
- A pop-up will appear
- Seller can select the shipping method from the enabled carriers
- Configure and save the shipping details
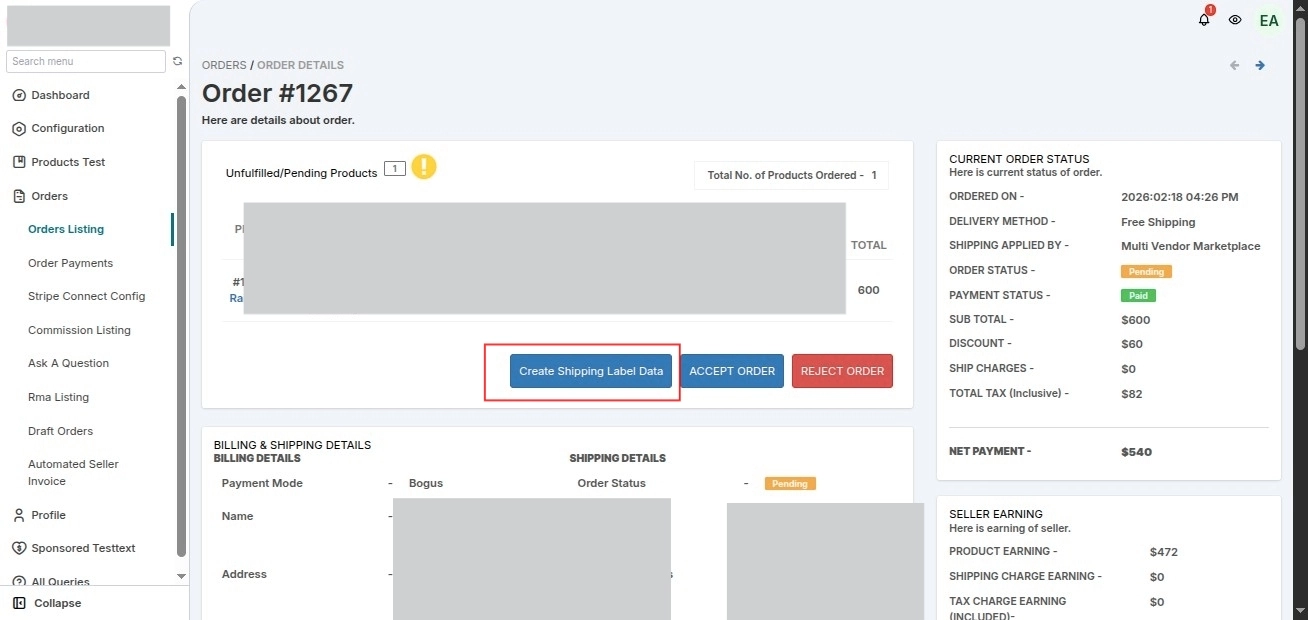
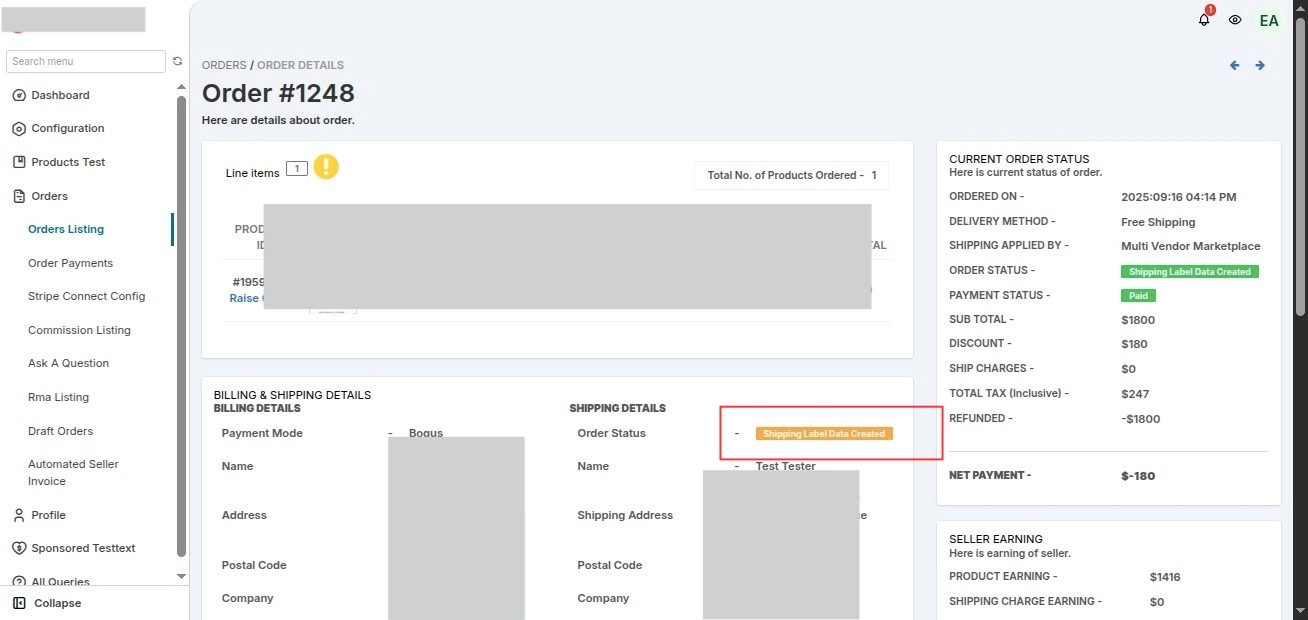
Step 3: Generate Shipping Label from Order
- Go to Orders
- Click on View Order
- Click on Create Shipping Label Data
The system will generate a CSV file.
The CSV file includes:
- Tracking Number
- Tracking URL
- Shipment Details
- Complete Carrier Information
Once the shipment is completed successfully, the order status will automatically update to Shipped.
SCHEDULE DEMO
Click here to Schedule the demo of Multivendor marketplace App for Shopify