Discount
The Webkul Multivendor app now makes it easier for admins to empower sellers with discount management.
As an admin, you can decide whether sellers are allowed to create discounts directly from their dashboards.
Based on your configuration, sellers will be able to:
1- Create discounts on individual products
2- Create discounts on the overall order
Create Discounts On Products
The admin needs to follow the steps to create discounts on products.
Configuration: Admin End
To configure this feature, follow the path:
Admin Dashboard>>Configuration>>Discount Configuration
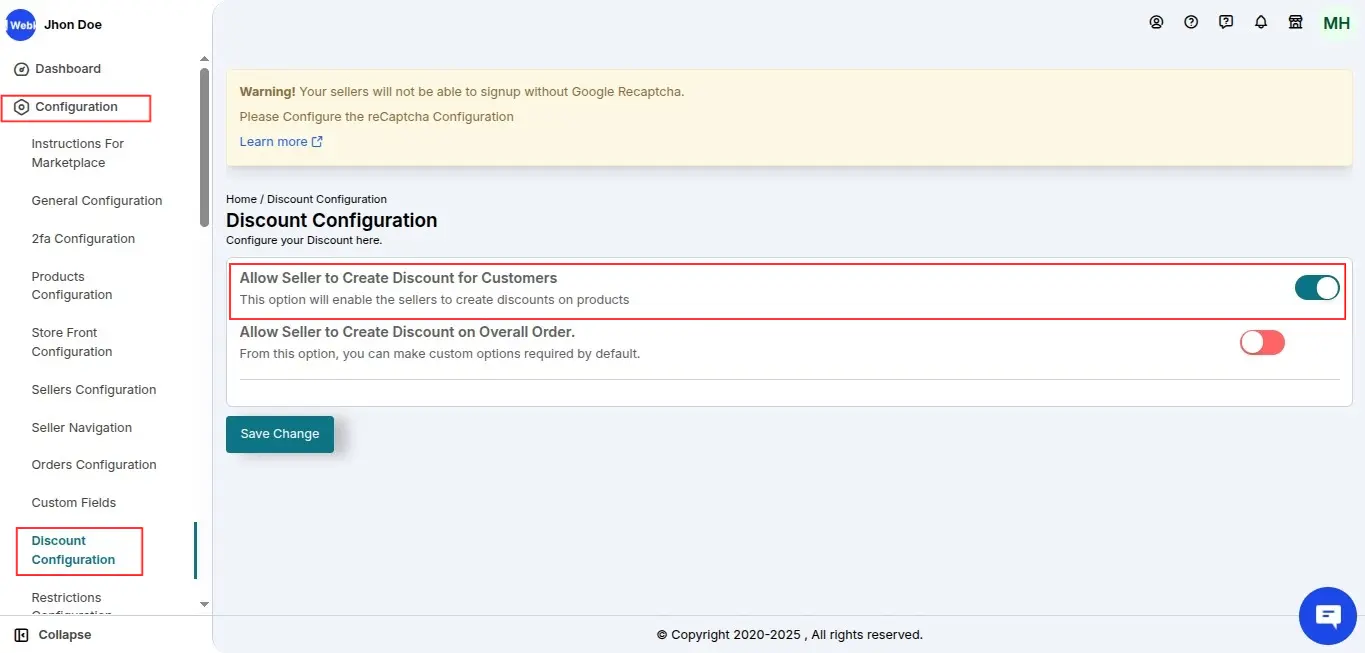
Click "Allow Seller to Create Discounts on Products" and save the settings.
As soon as the admin configures these settings, sellers will get the option to create discounts on products from their respective seller panels.
Seller Creating Discount on Product
The seller needs to follow these simple steps to add discounts to products:
Go to the Product section>>Select Discount >>Add Discount button.

Select the discount type (Percentage or Fixed), enter the discount value, and choose the product to apply it to.
Set the start and end dates to define the validity period of the discount, then save changes.
The seller will see all the discounts added to their store in the Discount section.
Create Discounts On Order
The admin needs to follow the steps to create discounts on overall orders.
Configuration: Admin End
To allow sellers to create discounts on the overall order, the admin needs to navigate to:
Admin Dashboard>>Configuration>>Discount Configuration
Enable “Allow Seller to Create Discounts on Overall Order” and save the settings.

Once configured, sellers will have the option to create discounts on the overall order from their respective seller panels.
Seller Creating Discount on Order
The seller needs to follow these steps to create discounts on overall orders:
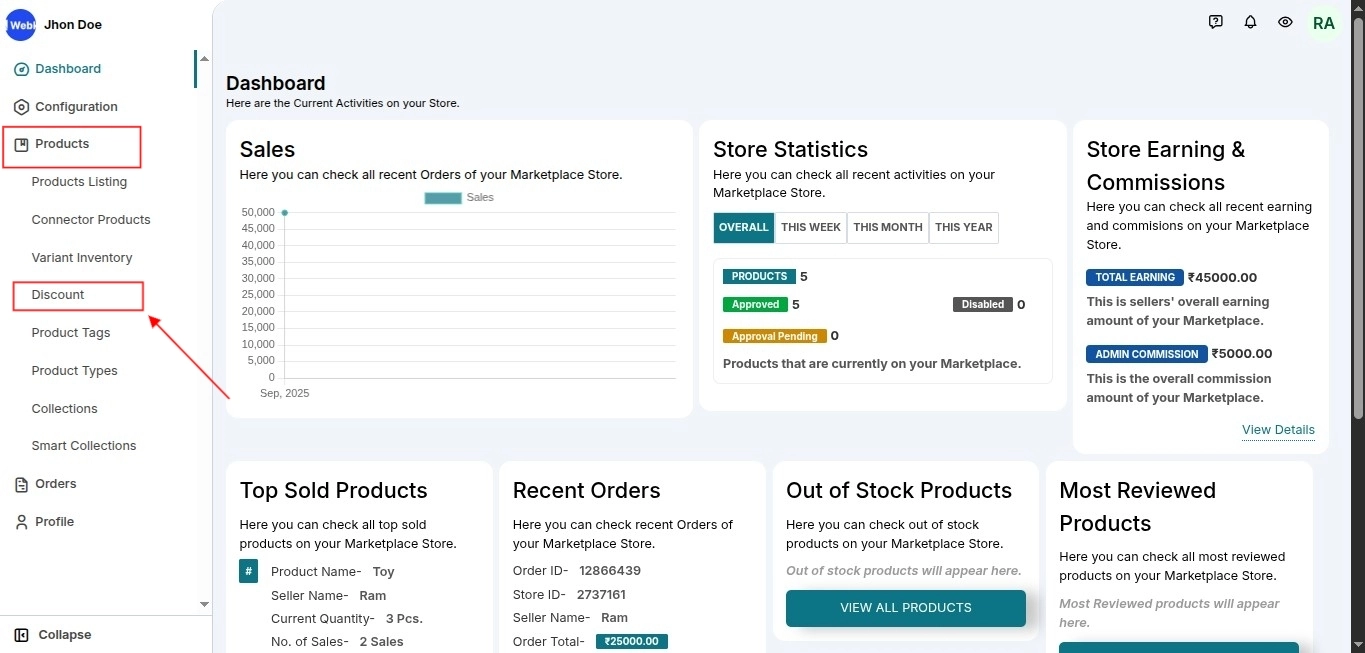
Go to the Product section of the seller panel.
Select Discount from the drop-down menu.
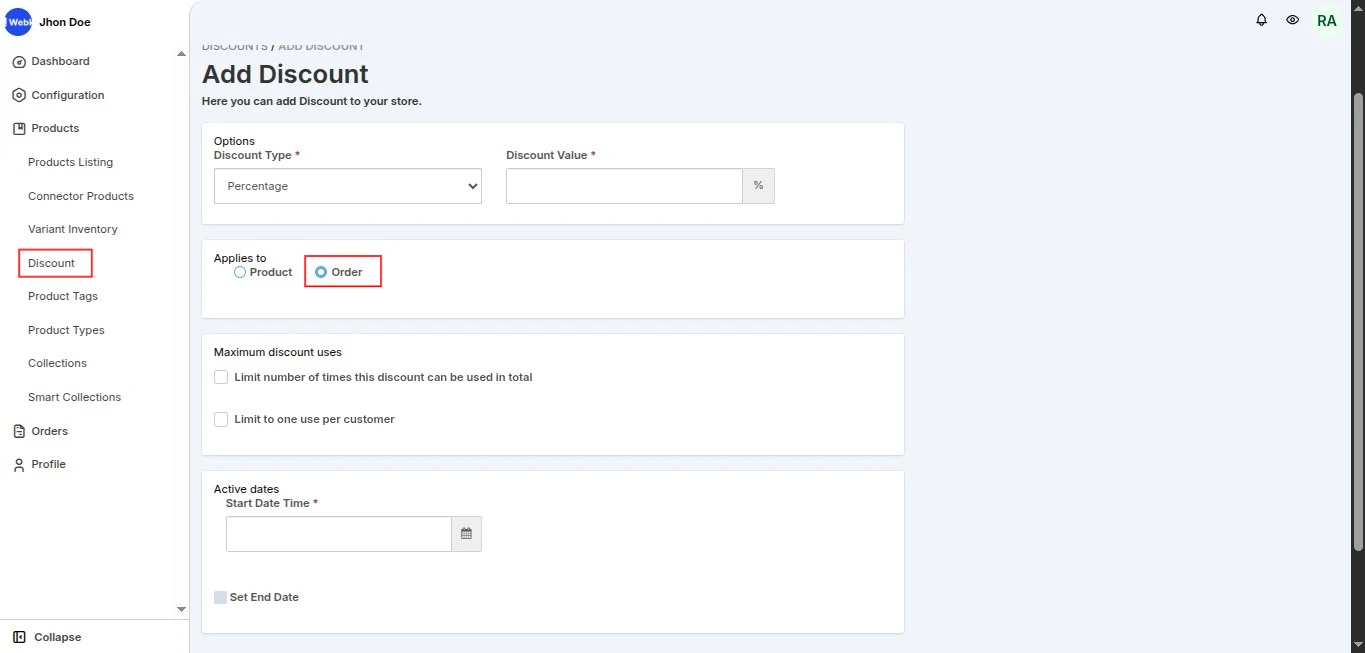
Click the Add Discount button.
Select the Discount Type (Percentage or Fixed) and enter the discount value. Select 'Order' as the discount applies to.
Set the start and end date of your discount as the validity period. Save changes.
The seller will see all discount codes added to their store in the Discount section.

Please note: The overall order discount works based on the seller’s smart collection, and the discount will also be applied seller-wise on the front end.
Discount Status
Scheduled: If the start date is in the future.
Active: If it has started but not yet ended.
Expired: If both the start and end dates have passed.
Front end
In order to display the discount on the front, you need to add the codes to the suggested liquid files (as shown in the screenshot).
So, go to the Multivendor Admin Panel and navigate to:
Configuration >>Instruction for Marketplace >> Scroll down to get the codes for “Discount” >> Copy the code from there & add it to the instructed liquid files.

In this way, the discount will be visible on the front.
