Till now you must have switched to the new theme, or some of you have just installed the Multivendor Marketplace App and want to have the "Seller Membership" feature app, then do refer to this.
This feature app allows the Admin/Store Owner to make plans for the Sellers and they need to subscribe to the plan in case they need to publish the products in the Admin Shopify Store.
Features
- Admin can make membership plans for the Sellers.
- Sellers can subscribe to the plan to publish their products to the admin's store.
- Being an admin, You can enable or disable the membership for the sellers.
- If disabled, Your sellers will log in directly to their respective seller panels without having a membership.
- Admin can allow sellers to deactivate their membership plan if required.
- He can also set a one-time Setup fee for Sellers for the Plans he creates.
Admin will set the payment methods through which he/she wants the payment from sellers. You can activate any of the payment methods of your choice from the Payment Details section.
The featured app is a monthly costing of $25 USD per month apart from the Multivendor App.
Check the below video of Seller Membership:
Activation
You need to enable the App from here:
Go to Admin Panel → Feature App section → Enable the feature → Save Changes.

Once you enable the featured app, you need to approve the charges for the app i.e. $25 USD/month.
Admin End
Once the App is activated, Admin will configure the same from the Configuration → Membership Configuration menu:

- Display Membership Plan to Seller – Choose if sellers should pick a plan during or after signup.
- If Seller Payment is Due – Choose what happens if a seller misses payment: block access, disable products, etc.
- Apply Updated Plan Changes – Choose whether updated plans apply to all or only new sellers.
- Enable Membership for Sellers – Toggle to enable/disable the membership requirement.
- Allow Seller to Deactivate Membership – Let sellers cancel membership if needed.
- Provide Plan Link on Seller Dashboard Header – Show a "Plan" link on the seller panel header.
Accept Card Details Before Trial Period
Go to Multi-vendor Admin Panel → Configuration → Membership Configuration, then enable the tab.

Create New Plans
Go to Sellers → Seller Membership Plans in the app.

Create Membership Plans for the Seller:

While creating a plan:
- Enter name, price, billing cycle (monthly/yearly).
- Choose product limit (unlimited or fixed count).
- Set due date, grace period.
Set Commission on Membership Plans
While creating a plan, enable Set Commission by Membership Plan and enter a percentage.

Commission Priority: Membership > Product-wise > Category-wise > Seller-wise > Global
Restrict Sellers to Add Staff in Membership Plan
If using the Seller Staff App, restrict staff per membership plan.

Set One-Time Setup Fee for Sellers
Set one-time setup fee when creating plans.

Reorder plans via:
Sellers → Seller Membership → REORDER PLANS

Assign Membership Plans to Sellers
While Adding Seller:
After filling details and clicking Save, select a plan.
While Editing Seller:

You’ll see plans appear after clicking Save Changes.
View subscribed sellers here: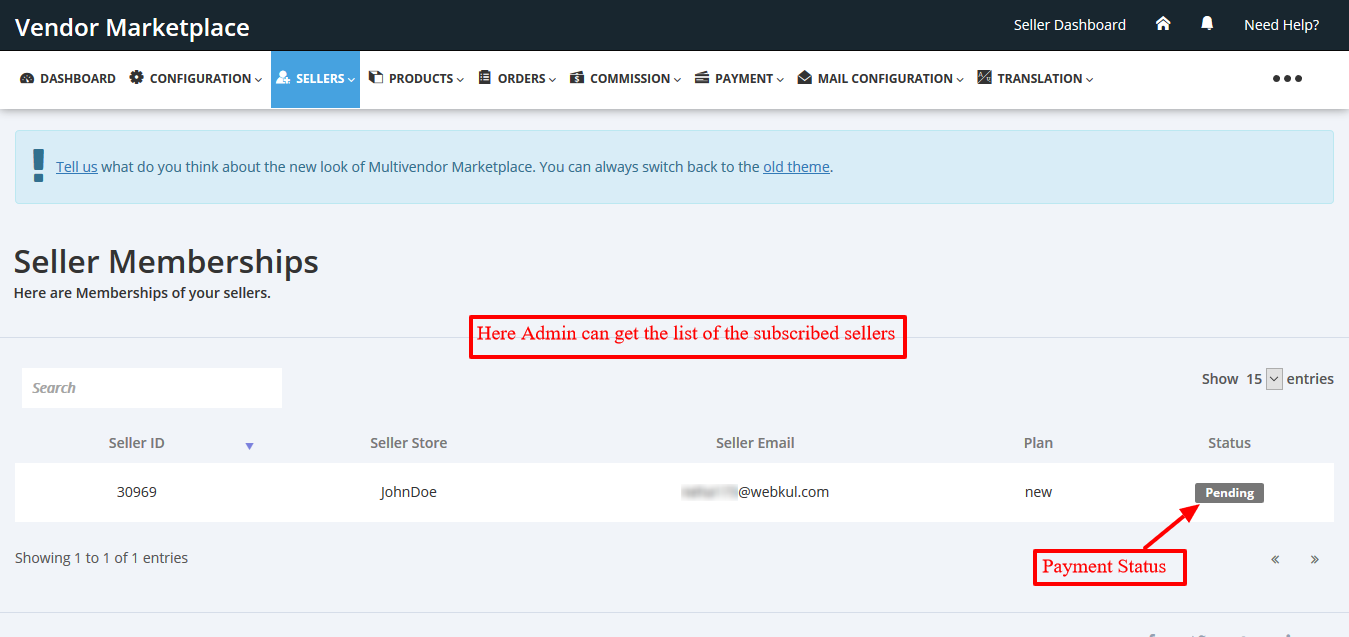
Payment from Seller
More on this here:
👉 Seller Membership Payment Methods
Steps:
Go to Configuration → Payment Details

Seller End
Sellers will see membership options right after signing up.


If it’s a Prepaid Plan, seller chooses and pays via available payment methods:

Deactivate Plan (Admin & Seller)
Admin Panel:
Go to Sellers → Membership Plan → Select Seller → Deactivate

Seller Panel:
Admin must first enable this from Membership Configuration:

Then seller can do:
- Go to Seller Panel → Profile → Membership Plan
- Click Deactivate

To update card details, click View → Update Card:


If card is invalid:

Payment History
Admin:
- Go to Sellers → Seller Memberships → Select Seller → Payment History → View


Seller:
- Go to Profile → Membership Plan
Display Membership Plan Only to Selected Sellers
Enable Assign to Particular Seller while creating the plan and enter seller emails.

EcPay Payment Method for Membership
How to Enable EcPay:
- Go to Configuration → Membership Payment Details
- Activate EcPay
- Enter Merchant ID, Hash Key, Hash IV


Seller Flow:
- Choose plan → Select EcPay as payment method
- Click Pay and Proceed

- Enter payment details on EcPay page → Submit OTP


- See Payment Success message

Note: After payment confirmation, seller is redirected automatically.
How to Deactivate Membership
- Seller Dashboard → Profile → Membership Plan
- Click Deactivate, confirm.


Test with EcPay sandbox:
👉 EcPay Developer Sandbox